Tired of bland, mass-produced furniture? Yearning for unique pieces that reflect your personal style without breaking the bank? Then look no further! This project demonstrates how a simple, often overlooked thrift store desk can be transformed into two stunning, customized nightstands. Forget expensive, cookie-cutter options; with a little creativity and elbow grease, you can create truly bespoke bedside companions. We'll be breathing new life into a forgotten piece, showcasing the remarkable potential hidden within secondhand treasures.
This DIY makeover is surprisingly easy and affordable, perfect for beginners and seasoned crafters alike. From selecting the perfect desk to choosing the right paint and hardware, we'll guide you through each step of the process, offering tips and tricks along the way. Ready to unleash your inner interior designer and turn that humble thrift store find into a show-stopping piece? Let's dive into the detailed, step-by-step instructions!
Preparation and Safety Guidelines
- Scraper
- Dremel Multi-Tool
- Table Saw
- Sandpaper (150 grit, 220 grit, 400 grit)
- Wood Filler
- Quick Wood
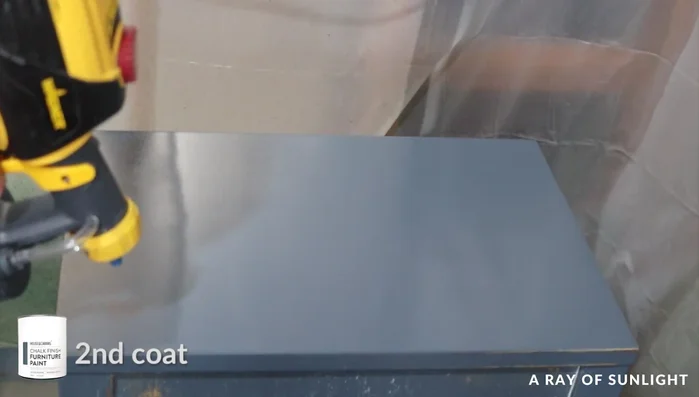
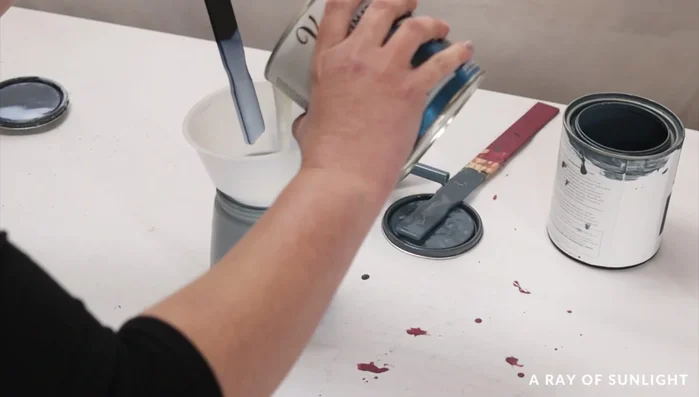
- Paint Sprayer (Wagner Flexio 3000 recommended)
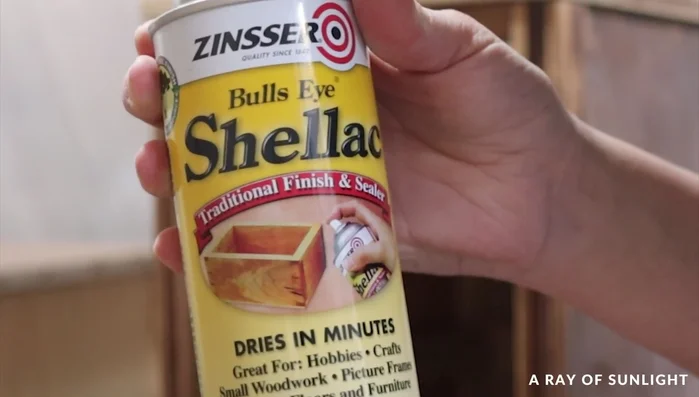
- Shellac
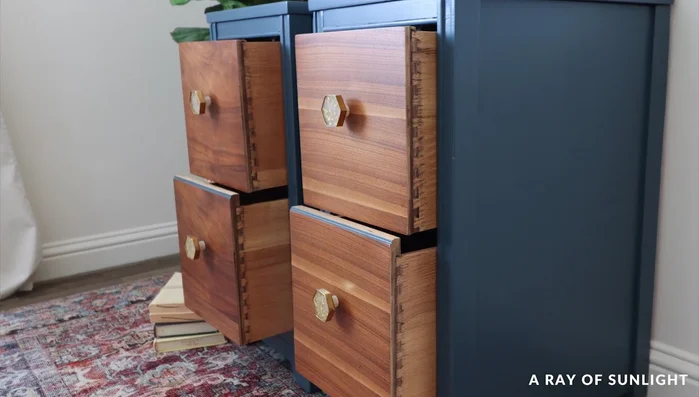
- House and Canvas Paint (Industrial Blue)
- Satin Water-Based Polyurethane
- Nail Gun
- Wood Glue
- Always disconnect any electrical components before sanding, painting, or making any modifications to the desk. Failure to do so could result in serious injury or electrocution.
- Use appropriate safety gear, such as eye protection and a dust mask, when sanding and working with paints or stains. Wood dust and paint fumes can be harmful.
- Ensure the desk is structurally sound before beginning your makeover. If the desk is unstable or damaged, address those issues before proceeding with cosmetic changes to prevent injury or further damage.
Step-by-Step Instructions
Preparation
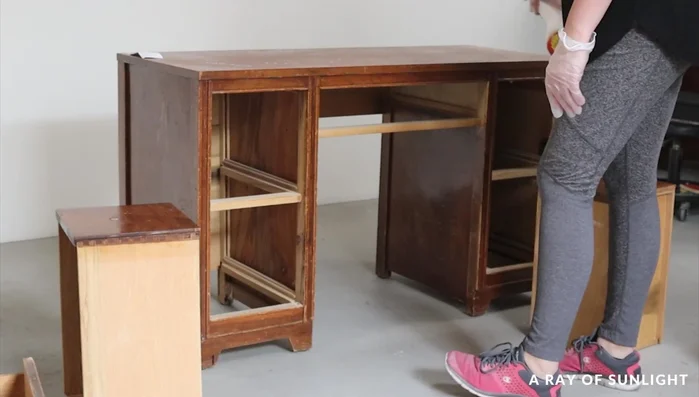
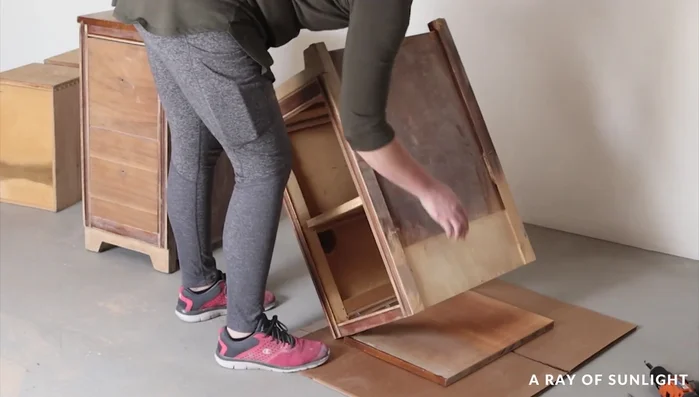
- Remove hardware and clean the desk thoroughly.
- Remove the desk top using screws and nails.
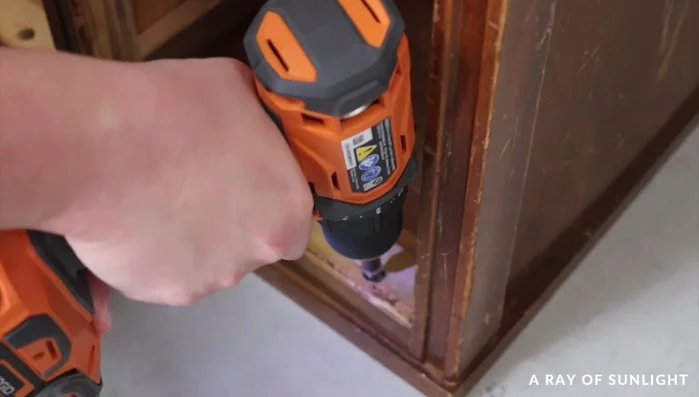
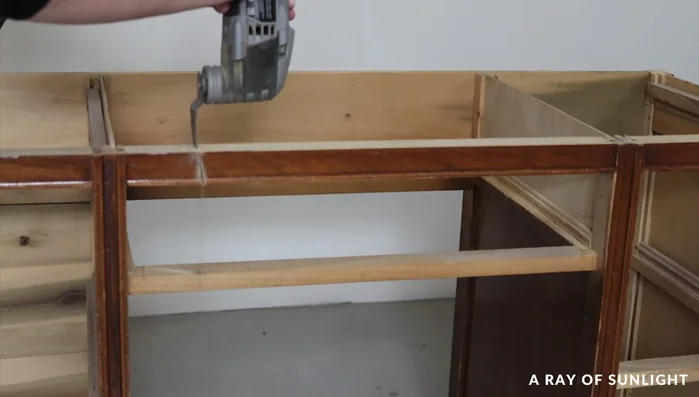
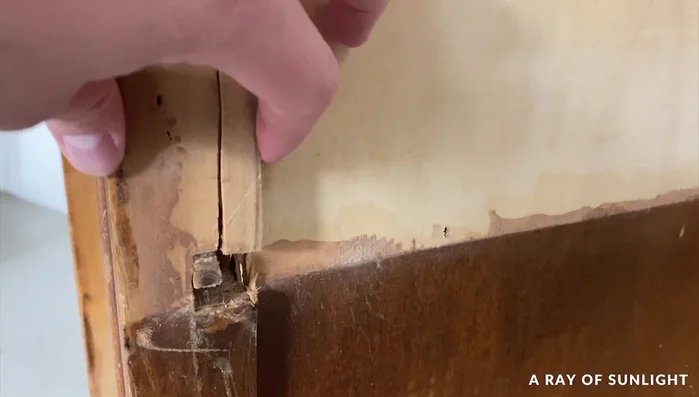
- Cut away the middle section of the desk using a Dremel Multi-Tool.
- Remove the wood and drawer tracks.

Preparation Repair and Refinement
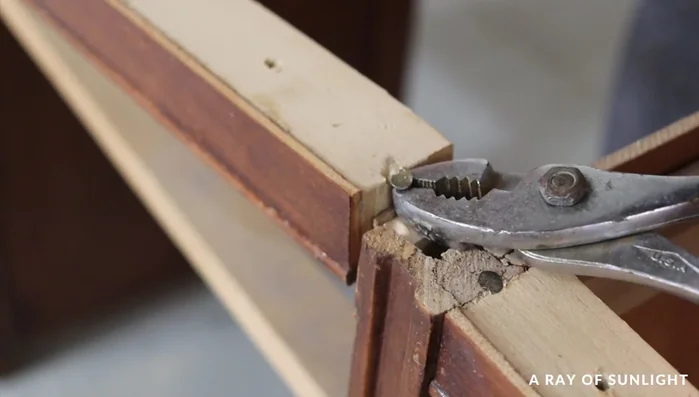
- Repair damaged areas with wood glue and wood filler.
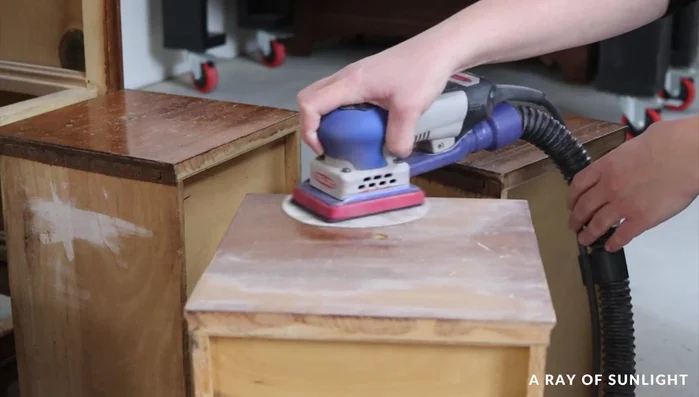
- Sand the entire surface (desk and drawers) using 150 grit and then 220 grit sandpaper.
- Fill wood grain, caulk seams, and sand smooth.
Repair and Refinement Nightstand Construction
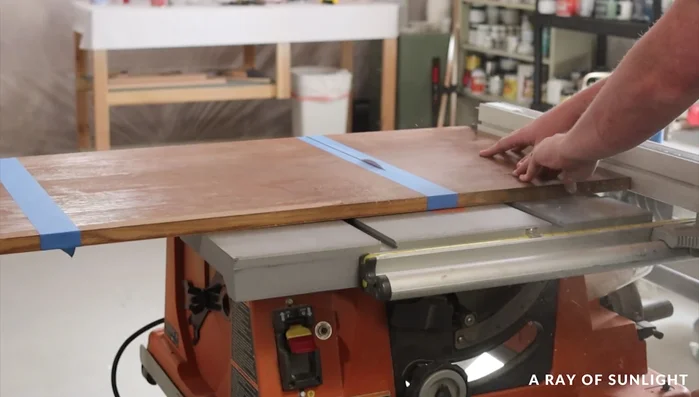
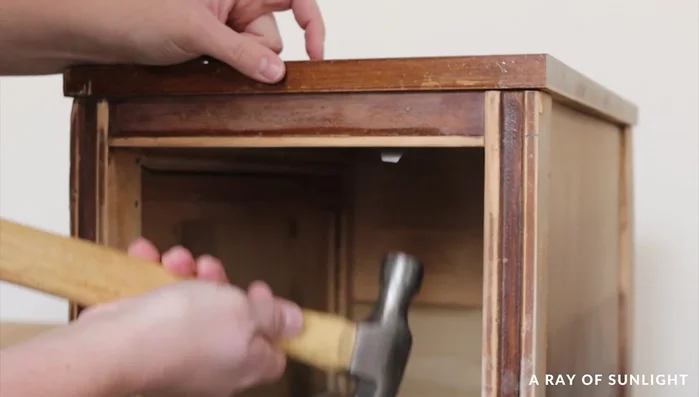
- Cut the new nightstand tops from the original desk top using a table saw. Use tape to prevent veneer cracking.
- Attach the new tops to the desk bases using the original screws and nails.
- Replace any missing drawer stoppers.
Nightstand Construction Priming and Painting
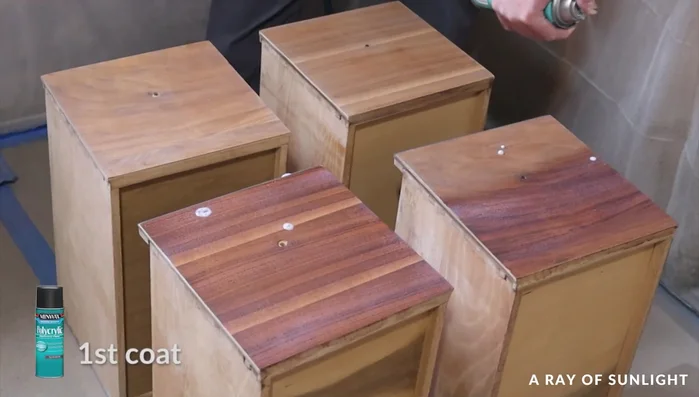
- Prime with two coats of clear shellac, allowing one hour drying time between coats and overnight drying before painting.
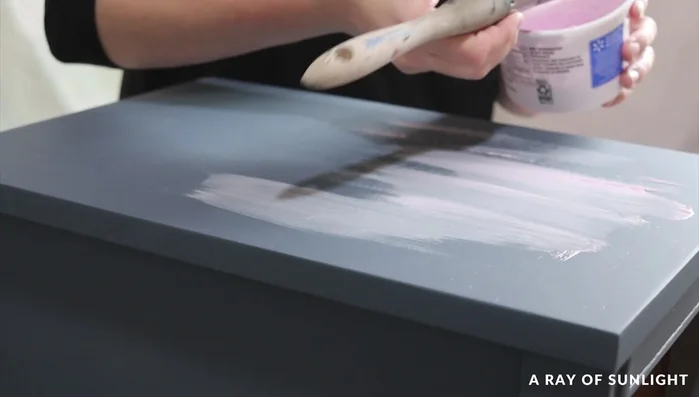
- Spray paint using a paint sprayer (thinned paint for a smoother finish). Apply at least two coats.
- Apply another coat of shellac to prevent bleed-through.
- Apply two or three more coats of paint, sanding lightly between coats if necessary.
Priming and Painting Finishing
- Spray drawers with polyurethane, sanding between coats to ensure smooth finish. Use caution to prevent drips.
- Spray nightstands with polyurethane. Multiple coats may be needed; sand lightly between coats to prevent runs and drips. Careful adjustment of sprayer settings is crucial to prevent drips.
- Install new hardware.
Finishing


Read more: DIY Upcycled Bed Frame: A Step-by-Step Guide
Tips
- Use tape when cutting veneer to prevent splitting.
- Clear shellac prevents wood tannins from staining paint and improves paint adhesion.
- Thinning paint with water improves sprayer application and finish.
- Properly adjust sprayer settings to avoid drips and runs.
- Sand lightly between coats of paint and polyurethane for a smooth finish.