Proper roof ventilation is crucial for maintaining a healthy and long-lasting roof, preventing moisture buildup that can lead to costly repairs. A key component of this ventilation system is the roof vent pipe flashing, which ensures a watertight seal around your vent pipes, protecting your home from leaks and water damage. Improperly installed flashing is a common culprit in roof leaks, making it a vital area to understand and execute correctly. DIY installation is possible with the right knowledge and tools, saving you money compared to hiring a professional.
This guide provides a comprehensive, step-by-step process for installing roof vent pipe flashing effectively. We’ll walk you through each stage, from choosing the right materials to securing the flashing, ensuring a robust and leak-proof seal. So, let's dive into the detailed instructions and learn how to confidently install your roof vent pipe flashing.
Preparation and Safety Guidelines
- Laser level
- Plumb bob
- Hole saw (3 5/8 inch)
- Hook blade knife
- Roof boot flashing
- Pipe flashing
- Caulk
- Roofing nails
- Measuring tape
- PVC pipe (1.5 inch and 2 inch)
- PVC glue
- Always work with a partner for safety, especially when working at heights. Never work alone.
- Use appropriate safety equipment, including a safety harness and fall protection if working on a sloped roof. Wear sturdy footwear with good grip.
- Before starting, check local building codes and regulations regarding roof penetrations and flashing installation. Improper installation can lead to leaks and damage.
Step-by-Step Instructions
Planning and Preparation
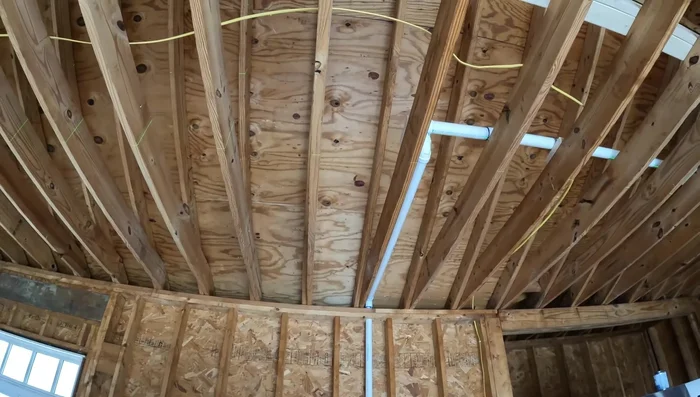
- Rough-in plumbing in the basement and attic. Secure pipe with branch strapping.
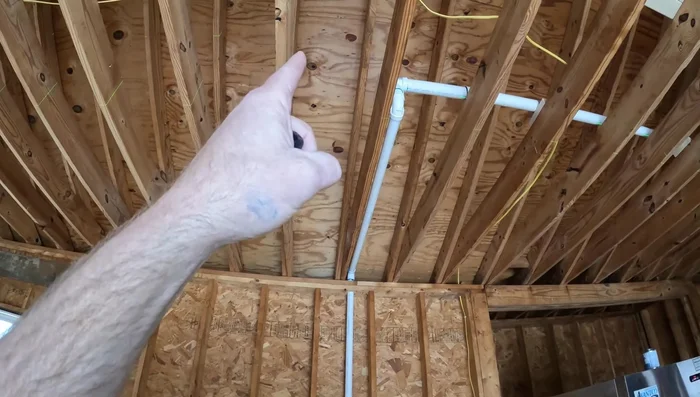
- Locate the desired vent location on the roof, ensuring it's at least four feet away from valleys and not obstructing views.
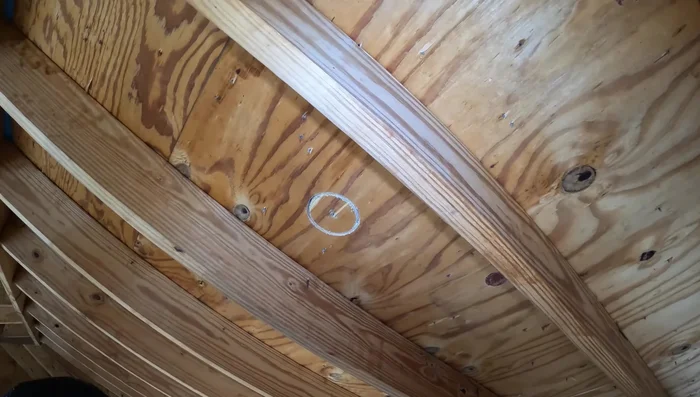
- Use a laser level and plumb bob to precisely mark the penetration point on the roof.

Planning and Preparation Roof Penetration
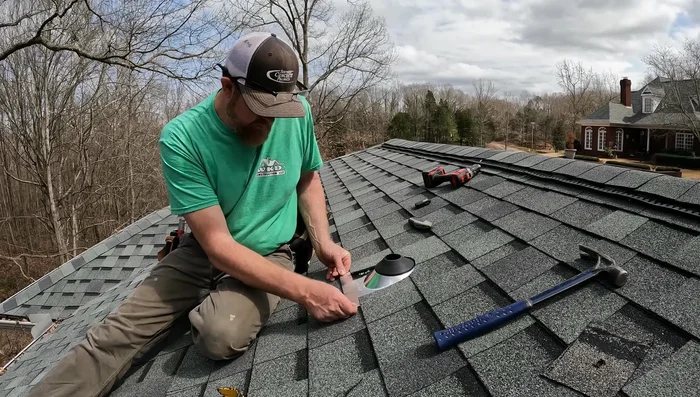
- Drill a hole through the roof decking using a 3 5/8 inch hole saw to accommodate for the roof's skew and provide clearance.
- Carefully cut the hole, avoiding damaging the shingles. Cut through the decking only, and then finish cutting the shingles from the top.
Roof Penetration Flashing Preparation and Installation
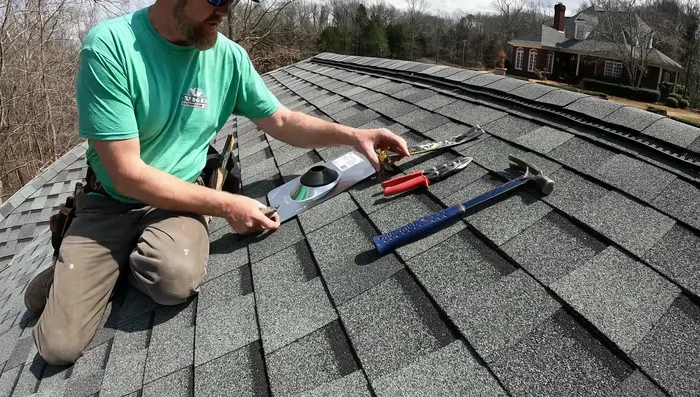
- Prepare the roof boot flashing. Measure and cut to fit the hole.
- Dry fit the pipe and flashing to ensure proper alignment and measurements before gluing and securing.
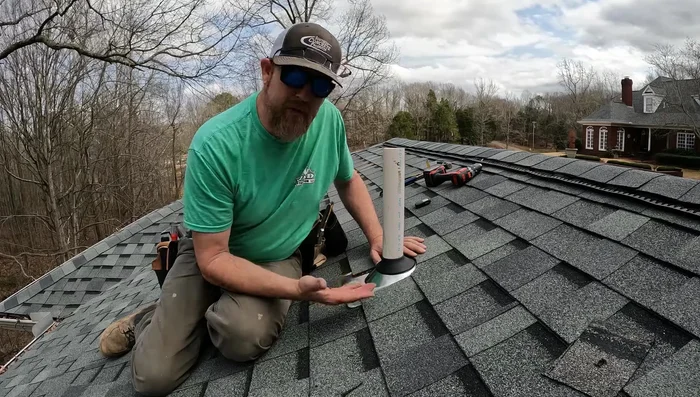
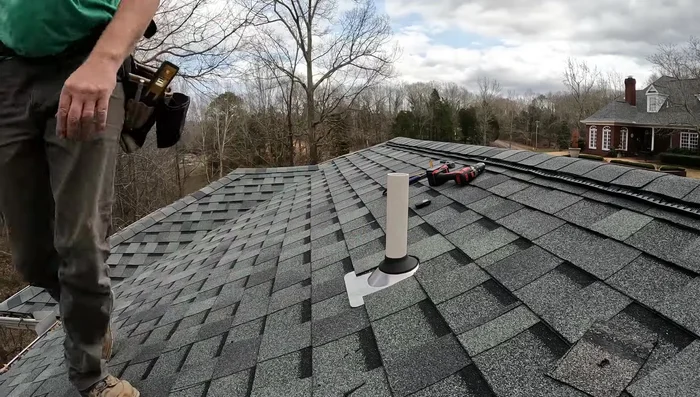
- Insert the pipe and flashing into the hole. Secure the flashing with roofing nails.
Flashing Preparation and Installation Pipe Installation and Finishing
- Cut the pipe to the desired length, ensuring it extends below the ridge cap.
- Glue the pipe fitting and secure the flashing. Check for any gaps and seal as needed.
Pipe Installation and Finishing
Read more: DIY Roof, Shingle, Fence, and Flashing Repair with Henry Wet Patch 208
Tips
- Maintain a distance of at least four feet between the vent and any roof valleys.
- Use a larger hole saw (3 5/8 inch) to account for roof skew and provide clearance.
- Do not cut all the way through the shingles with the hole saw. Cut through the decking first, then remove the excess shingles carefully from above.
- Consider using a roof boot flashing that allows for easy replacement of the rubber gasket without having to replace the entire flange, particularly for older homes.