A leaky roof pipe collar, also known as a vent collar, is a frustrating and potentially damaging problem. This seemingly small component plays a crucial role in preventing water intrusion into your attic and home, and a failure can lead to costly repairs down the line. Ignoring a leak only allows the damage to worsen, potentially resulting in mold growth, structural damage, and even compromised insulation. Understanding how to effectively seal this vulnerable point is vital for maintaining the integrity and longevity of your roof. A compromised seal isn't just an inconvenience; it's a significant threat to your home's health.
This step-by-step guide will walk you through the process of replacing a leaky roof pipe collar, providing you with the knowledge and confidence to tackle this repair yourself. We'll cover everything from assessing the damage and selecting the correct replacement collar to ensuring a watertight seal upon completion. Let's get started!
Preparation and Safety Guidelines
- Hammer
- Nail Puller
- New Pipe Collar
- Roofing Compound
- Utility Knife (Optional)
- Always turn off the power to the vent fan before starting any work to prevent electric shock.
- Wear appropriate safety gear, including gloves and eye protection, to avoid injury from sharp edges or falling debris.
- Work on a dry day to ensure safe footing and prevent further water damage. If working at height, use appropriate safety measures such as harnesses and scaffolding.
Step-by-Step Instructions
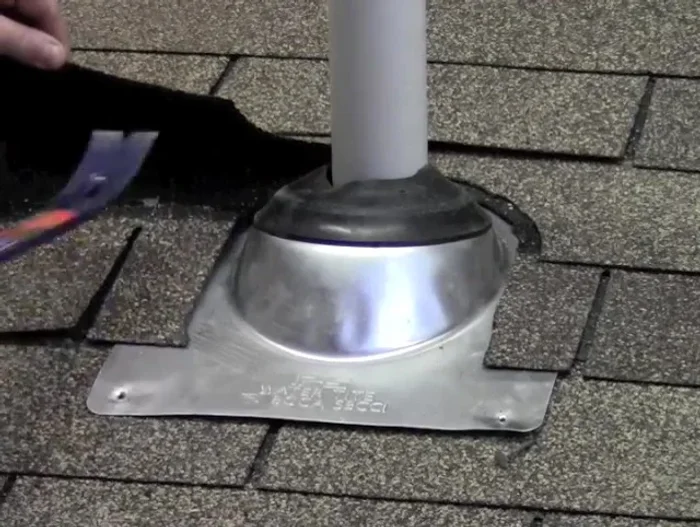
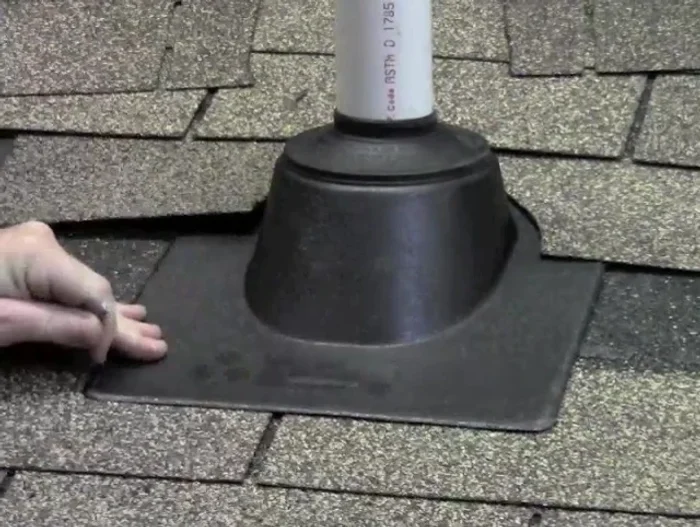
Remove Old Pipe Collar
- Start by carefully removing the nails securing the pipe collar to the roof shingles. There's usually one at the bottom and a few on the sides. Gently lift the shingles to access the nails.
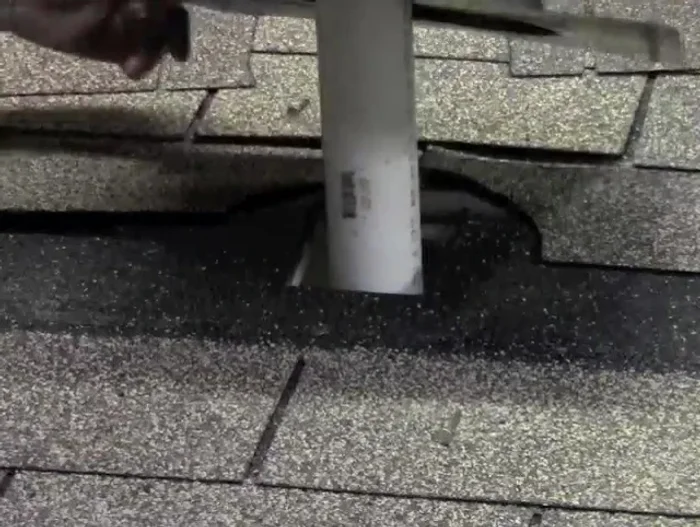
- Carefully remove the shingles around the pipe collar to allow for easier access and replacement.
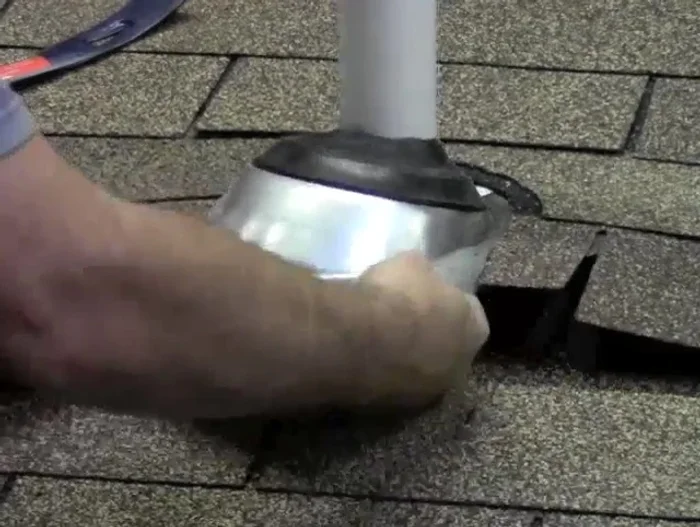
- Once the nails are out, remove the old pipe collar.

Remove Old Pipe Collar Install New Pipe Collar
- Place the new pipe collar onto the pipe. It should fit snugly.
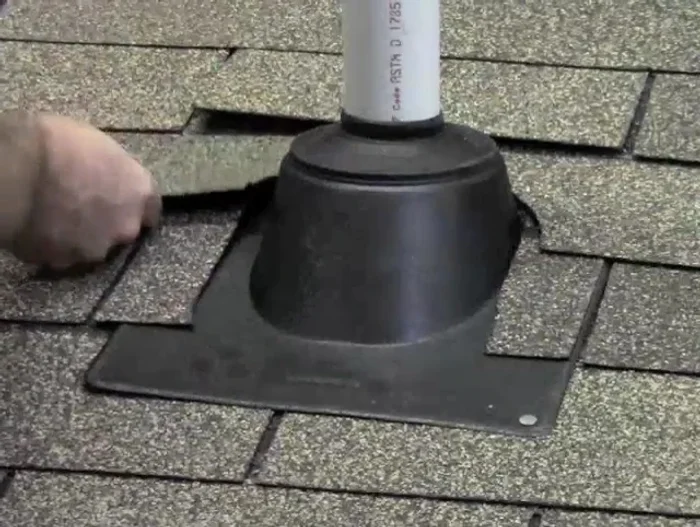
Install New Pipe Collar Adjust Shingles for Fit
- If the new collar doesn't fit perfectly under the existing shingles, you may need to trim the shingles slightly to allow for a flush fit.
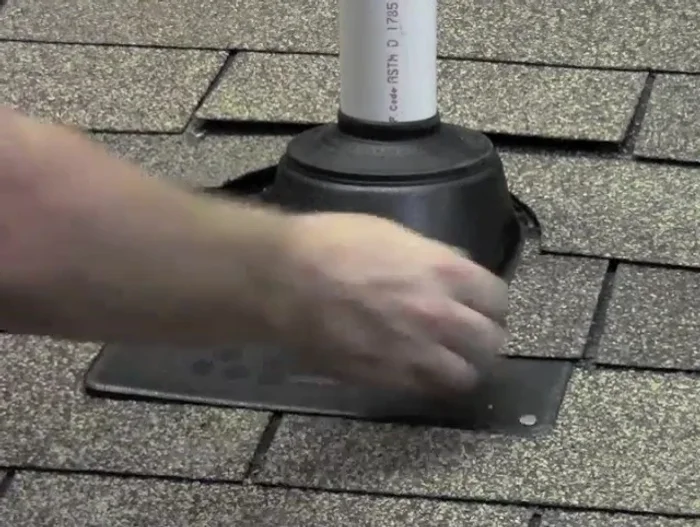
Adjust Shingles for Fit Secure and Seal New Collar
- Tack the new pipe collar into place using nails. Focus primarily on securing the bottom.
- Carefully replace the shingles around the new pipe collar, ensuring a tight seal.
- Apply roofing compound over the nails and any gaps to ensure a waterproof seal.
Secure and Seal New Collar

Read more: DIY Roof, Shingle, Fence, and Flashing Repair with Henry Wet Patch 208
Tips
- Never try to repair a cracked pipe collar with caulk or sealant; always replace it.
- Use fewer nails to minimize holes in the pipe collar and potentially improve its longevity.
- Ensure all original nails are replaced to prevent wind damage.