Cracked tiles, uneven surfaces, and that frustrating lippage – these common tile problems can significantly detract from the aesthetic appeal of your floors and walls. While professional tile repair can be costly, many minor issues are easily tackled with a little DIY know-how and the right tools. This empowers homeowners to reclaim the beauty of their tiled surfaces and save money in the process, avoiding the expense and scheduling hassle of hiring a contractor. From simple crack repairs to addressing the nagging unevenness of lippage, fixing your tiles can be a satisfying and achievable weekend project.
This guide provides a comprehensive step-by-step approach to repairing damaged tiles and eliminating the annoying problem of lippage. We'll walk you through the process, from identifying the correct tools and materials to completing the repair, ensuring a seamless and professional-looking finish. Let's get started and transform those imperfect tiles into a stunning, even surface!
Preparation and Safety Guidelines
- Chisels with handles (skinny and/or large)
- Hammer
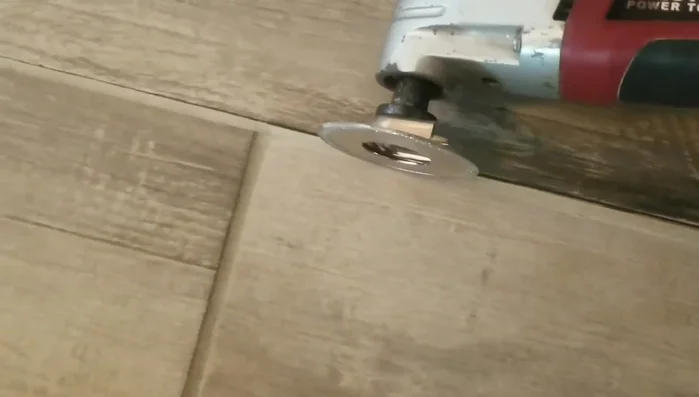
- Oscillating handheld saw
- Tile cutting blade for oscillating saw
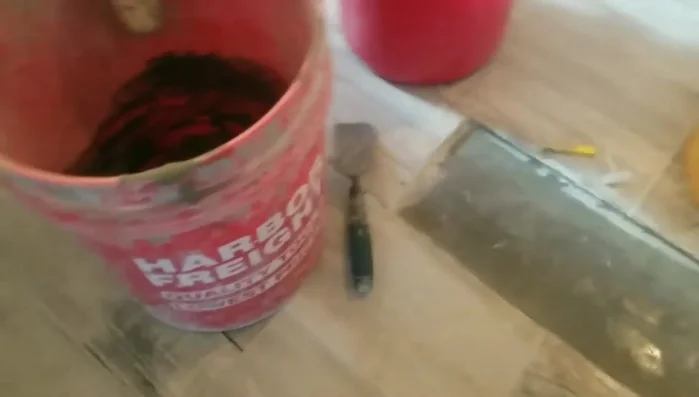
- Thinset mortar
- Notched trowel
- Spacers
- Sponge
- Water
- Leveler (optional)
- Always wear safety glasses and a dust mask to protect your eyes and lungs from tile dust and debris.
- Use appropriate safety gear like gloves to prevent cuts from broken tiles and sharp tools.
- Turn off power to any electrical outlets or circuits near the work area before starting the repair to prevent electric shock.
Step-by-Step Instructions
Tile Removal
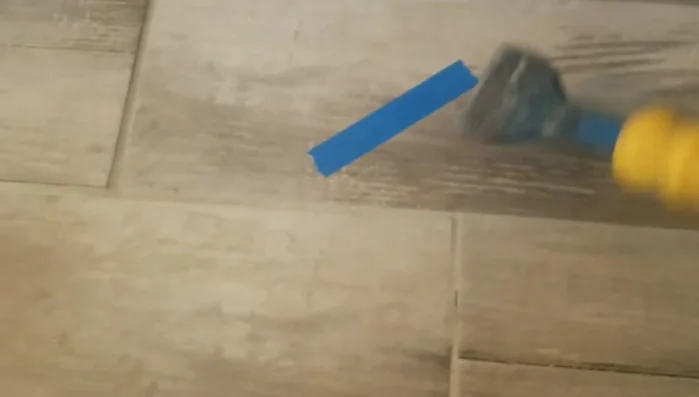
- Cut around the grout along the edges of the damaged tile using the oscillating saw with a tile blade. This separates the tile from the surrounding tiles.
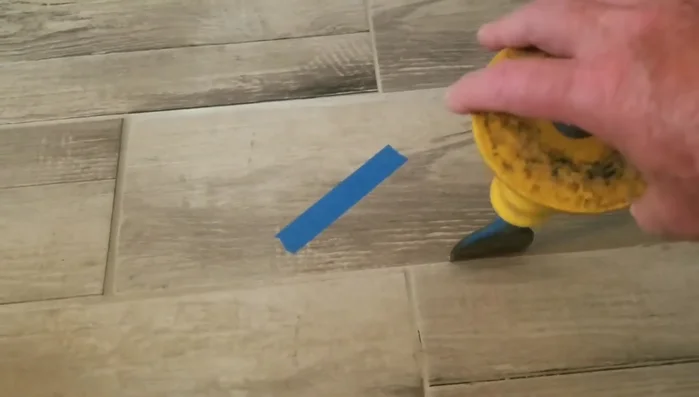
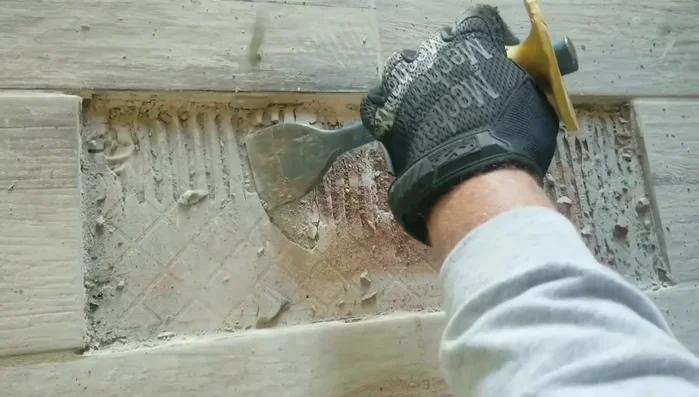
- Use a large flat chisel and hammer to split the tile in half, starting from the center. This minimizes damage to adjacent tiles.
- Gently hammer and pry the tile pieces up from the underlying mortar to remove them.
- Clean out the old mortar and grout completely, ensuring a flat and smooth surface for the new tile. Pay close attention to the edges and corners.

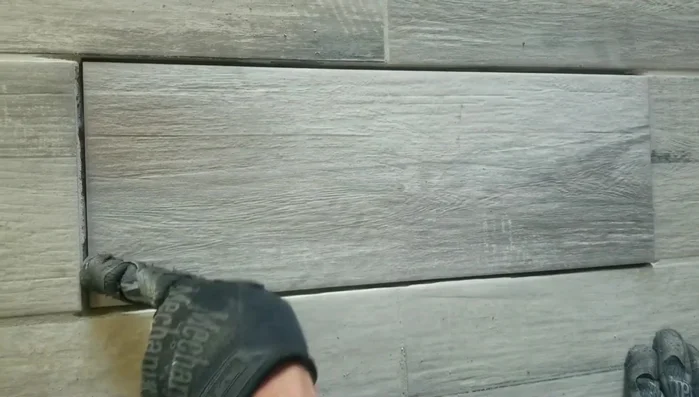
Tile Removal Preparation and Dry Fit
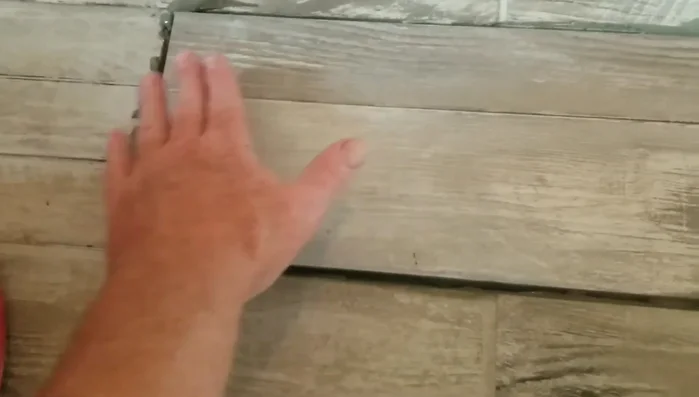
- Dry-fit the new tile to check for fit and adjustments needed. Check for lippage and make adjustments to the surrounding mortar to ensure a flush fit. Matching the grain direction of the new tile is also important.
Preparation and Dry Fit Mortar Application and Tile Setting
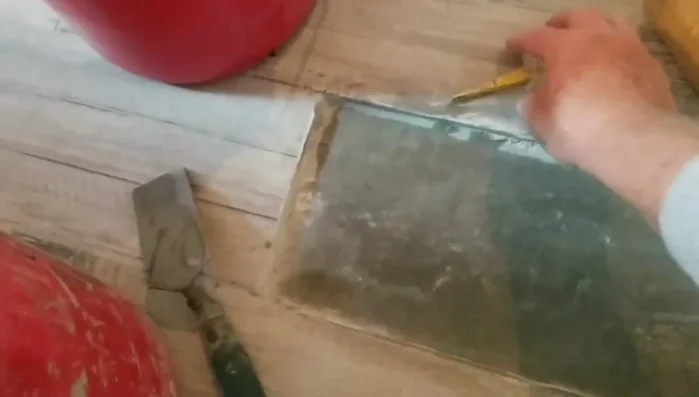
- Mix thinset mortar.
- Apply a layer of mortar to the area and spread it using a notched trowel to create the right thickness for bonding and leveling.
- Set the new tile into place, pressing down firmly and ensuring flush alignment with the surrounding tiles. Use spacers between tiles to maintain consistent spacing.
Mortar Application and Tile Setting Grouting and Finishing
- Allow the mortar to dry completely. Apply grout, and after grout has cured, clean the excess grout.
Grouting and Finishing
Read more: Fixing Drywall Nail Pops: A Quick and Easy DIY Guide
Tips
- Work carefully and patiently to avoid damaging surrounding tiles.
- Ensure a consistent thickness of mortar for proper adhesion and to prevent lippage.
- Use spacers between tiles for consistent grout lines.
- Check tile alignment frequently with a level for accurate installation.