Uneven floors are a common problem in older homes, causing wobbly furniture, tripping hazards, and an overall unsettling feeling. While professional leveling can be expensive and disruptive, a surprisingly effective and affordable solution exists for many situations: leveling with railway sleepers or similar reclaimed wood rails. This method offers a charming, rustic aesthetic while providing a stable base for your flooring, making it a great DIY project for homeowners with moderate skill levels. It’s particularly suitable for smaller areas needing a level base before final flooring is laid, offering a cost-effective alternative to complete floor replacement.
This DIY guide will walk you through each step of the process, from selecting the right materials and preparing the subfloor to installing the rails and ensuring a perfectly level surface. Get ready to transform your uneven floors into a solid, stable foundation, one railway sleeper at a time! Let's begin!
Preparation and Safety Guidelines
- Rails (2x4s or similar)
- Level
- Straight edge
- Screed
- Shims
- Floor leveling compound
- Circular saw
- Scribes
- Construction adhesive
- Drill
- Hammer
- Protective padding
- Always wear safety glasses and a dust mask to protect your eyes and lungs from debris and dust generated during the leveling process.
- Ensure adequate ventilation in the work area to avoid inhaling harmful fumes, especially when using self-leveling compounds.
- Use appropriate personal protective equipment (PPE) such as gloves to prevent skin irritation from contact with leveling compounds or other materials.
Step-by-Step Instructions
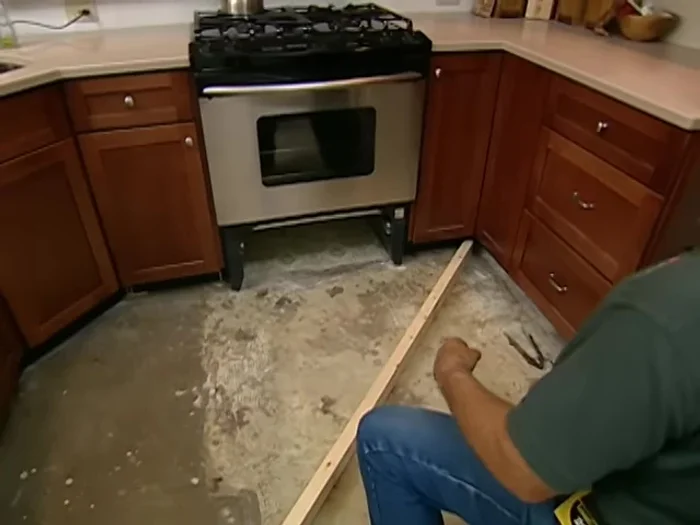
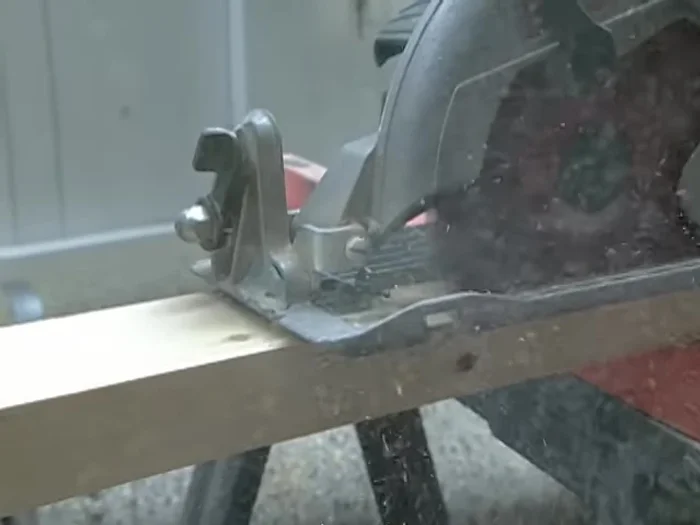
Prepare Rails
- Ensure they are straight. If not, use a straight edge and circular saw to create straight edges.
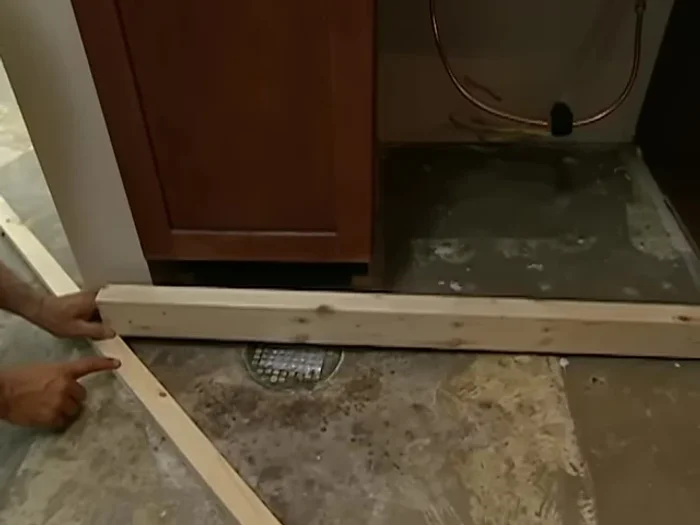
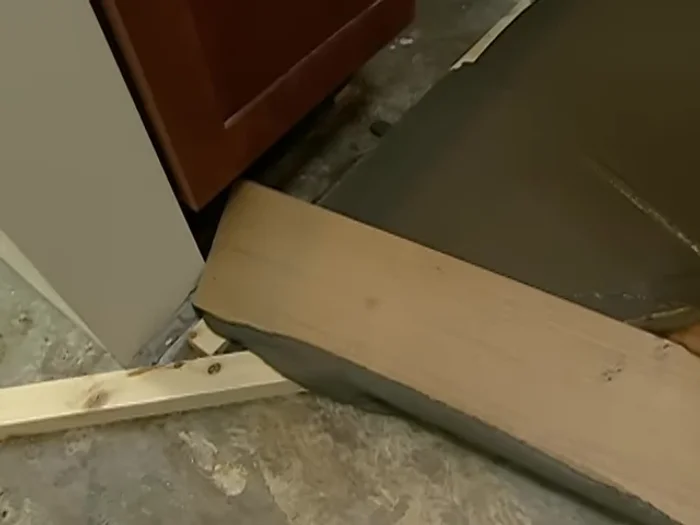
Install First Rail
- Place the rail in a corner at the highest point of the floor. Use shims and a level to adjust the rail to be perfectly level.
- Use scribes to mark the rail according to the floor's contour. Transfer these markings to the underside of the rail.
- Cut the rail along the scribed line. Position the rail on the floor and check for level. Attach it securely using construction adhesive and screws.

Install First Rail Install Subsequent Rails
- Place the next rail, resting it on the first rail. Check for level using a level and shims as needed. Use the same scribing method as before to match the thickness of existing rails.
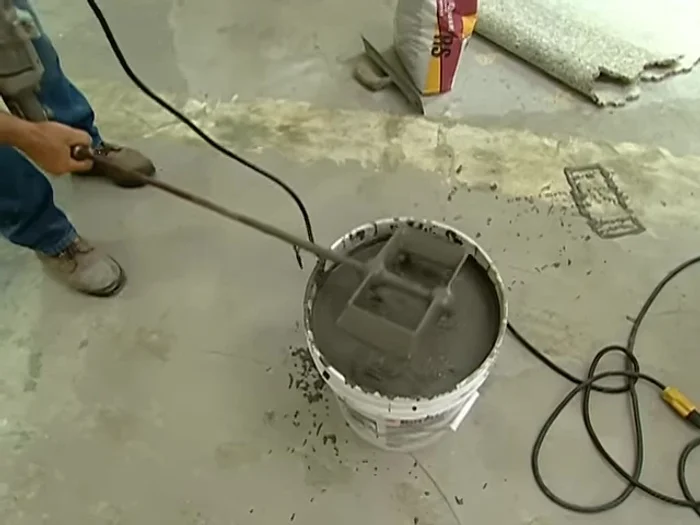
Install Subsequent Rails Apply and Level Compound
- Mix the floor leveling compound and apply it between the rails, ensuring it extends above the top of the rails.
- Use a screed to level the compound, ensuring it is even with the top of the rails.
Apply and Level Compound
Read more: Fixing Drywall Nail Pops: A Quick and Easy DIY Guide
Tips
- Use a straight edge and circular saw to ensure your rails are perfectly straight.
- Check for level frequently during the process, using a level and shims to make adjustments.
- Pre-drill pilot holes before screwing in the rails to prevent splitting the wood.
- Protect cabinets and other furniture using padding during the leveling compound application process.
- For areas with significant height differences, feather the rails into the high spot to achieve a smooth transition.