Chipped, gouged, or otherwise damaged furniture corners can significantly detract from a piece's aesthetic appeal, transforming a cherished heirloom or stylish addition into an eyesore. Fortunately, a surprisingly effective and relatively inexpensive solution exists for restoring these marred surfaces to their former glory: the Bondo method. This powerful automotive filler, known for its exceptional strength and easy application, offers a remarkable way to repair even the most severely damaged corners, leaving a smooth, paintable surface behind. Forget costly professional repairs or living with unsightly imperfections.
This simple yet robust technique allows you to revive your damaged furniture with minimal effort and expense. With just a few readily available materials and a bit of patience, you can achieve professional-looking results. Ready to transform your damaged furniture? Let's dive into the step-by-step process of repairing damaged furniture corners using Bondo.
Preparation and Safety Guidelines
- Bondo body filler
- Bondo spreader
- Hot glue gun
- Vaseline or cooking spray
- Utility knife
- Sandpaper (80 grit and 220 grit)
- Power sander (optional)
- Paint
- Always wear safety glasses and a dust mask when sanding and working with Bondo. Wood dust and Bondo dust are irritants.
- Work in a well-ventilated area. Bondo releases fumes during application and curing.
- Properly dispose of sanding dust and any unused Bondo according to local regulations.
Step-by-Step Instructions
Prepare the Mold
- Create a mold of an undamaged corner using hot glue. Apply Vaseline to the undamaged corner first to prevent the hot glue from sticking.

Prepare the Mold Mix the Bondo
- Mix the Bondo body filler with the hardener according to package instructions. Work quickly, as Bondo hardens fast.
Mix the Bondo Apply Bondo and Mold
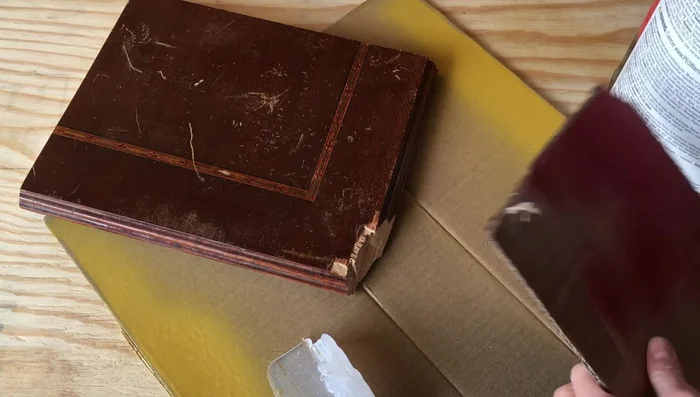
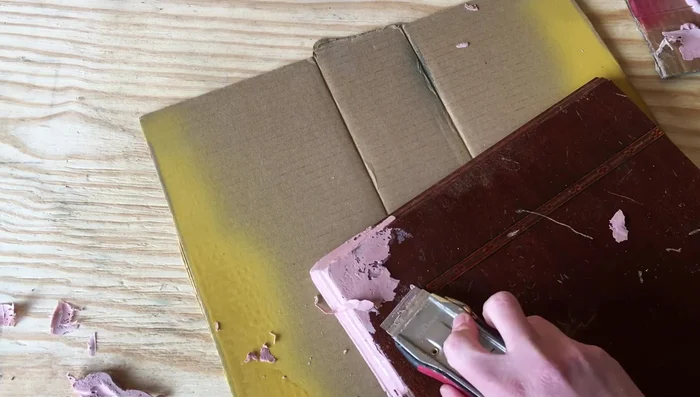
- Apply a generous amount of Bondo to the damaged area, pressing it into the damage for good adhesion. Work outside due to fumes and flammability.
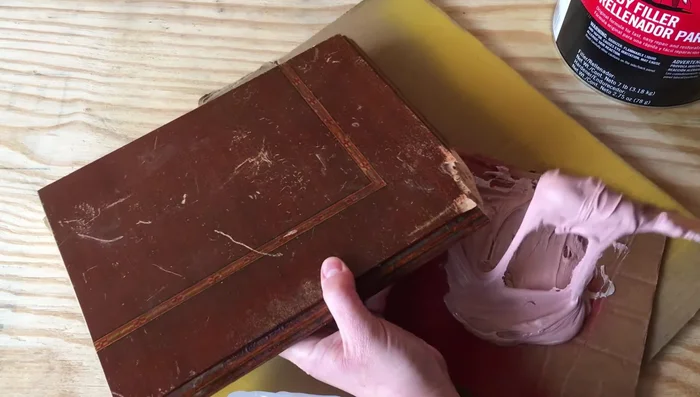
- Press the hot glue mold onto the Bondo, ensuring good contact with the existing wood. Hold for a few minutes until the Bondo starts to harden.
Apply Bondo and Mold Remove Mold and Trim Excess
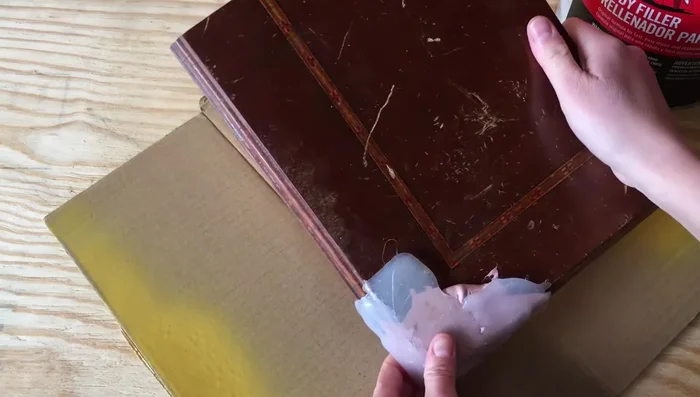
- Once the Bondo has begun to harden, carefully remove the mold. Use a utility knife to remove excess Bondo before it fully hardens.
Remove Mold and Trim Excess Cure and Sand
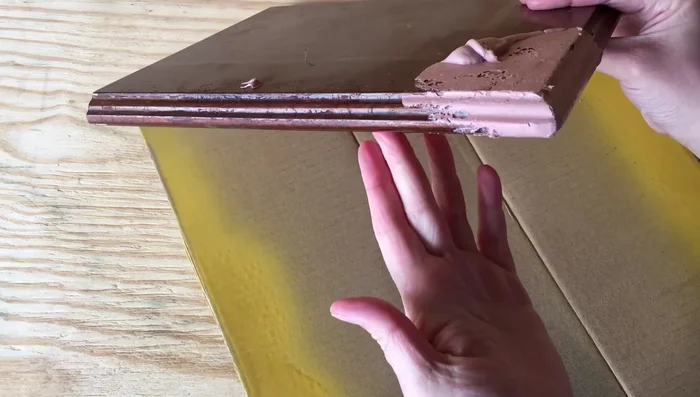
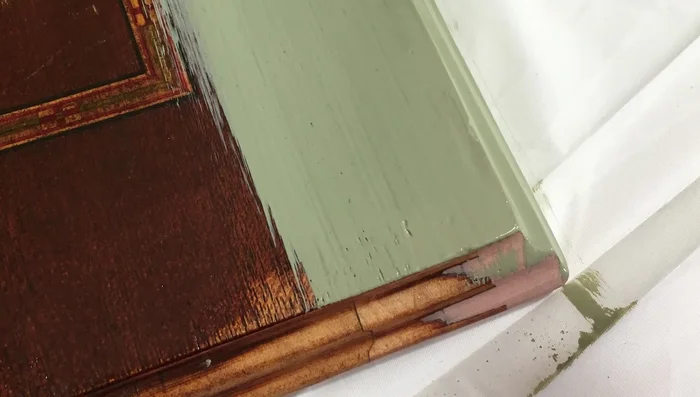
- Allow the Bondo to fully cure (about 30 minutes). Sand the repair smooth using a power sander (on flat surfaces) or by hand with sandpaper, starting with 80 grit and finishing with 220 grit.
Cure and Sand Fill and Sand Imperfections
- Fill any small air pockets with wood filler, let it dry, and sand smooth.
Fill and Sand Imperfections Paint the Repair
- Paint the repaired area.
Paint the Repair


Read more: Fixing Drywall Nail Pops: A Quick and Easy DIY Guide
Tips
- Use the pink hardener in Bondo; the color change helps ensure proper mixing.
- Don't use this method if you're not planning to refinish or repaint the furniture, as removing the hot glue mold might damage the existing finish.
- Always work with Bondo outdoors due to fumes and flammability.
- Apply Vaseline to the inside of the hot glue mold to prevent the Bondo from sticking.
- Remove excess Bondo with a utility knife before it fully hardens to minimize sanding.