Frustrated with clogged gutters, overflowing downspouts, and the constant chore of cleaning out leaves and debris? Tired of the unsightly mess and potential water damage caused by overflowing gutters? Investing in gutter mesh is a simple and effective solution to prevent these problems, offering long-term protection for your home's exterior. This superior filtration system keeps your gutters free-flowing, protecting your property from costly repairs and maintaining its curb appeal. Forget about ladders and tedious cleaning; gutter mesh offers a virtually maintenance-free solution.
This ultimate guide provides a comprehensive, step-by-step process for installing gutter mesh, ensuring a professional-looking and highly effective result. From choosing the right type of mesh to securing it properly, we’ll walk you through every stage, equipping you with the knowledge and confidence to tackle this project yourself. Let's dive into the detailed instructions and get started!
Preparation and Safety Guidelines
- Shingle lifter
- Self-tapping screws
- Tin snips
- Pliers
- Always use a sturdy ladder in good condition and ensure it's properly secured before climbing onto the roof. Never work alone.
- Wear appropriate safety gear including gloves, safety glasses, and sturdy footwear. Consider a safety harness for added protection, especially on taller buildings.
- Be mindful of electrical wires and avoid contact with them at all times. If unsure about the location of wires, contact a qualified electrician.
Step-by-Step Instructions
Preparing and Joining Sections
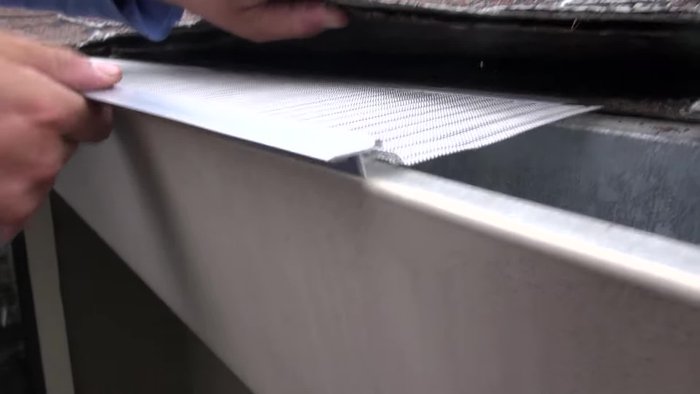
- Carefully lift up the shingles and slide the mesh into place for joining sections.
- Lay one end of the mesh so it overlaps directly over the other section.
- Fasten three self-tapping screws for each 4' section using the line guide on the aluminum extrusion as a reference. The screw's drill bit will go through the aluminum and gutter.

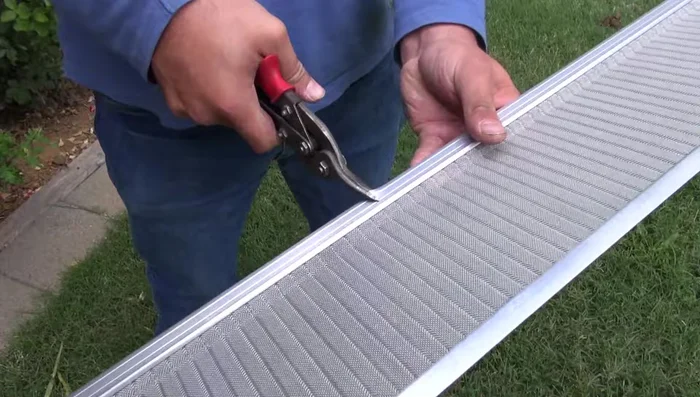
Preparing and Joining Sections Cutting Mesh and Aluminum
- For cutting the aluminum extrusions and mesh, use tin snips.
Cutting Mesh and Aluminum Installing Endcaps
- For the endcap, trim off the end and use the mesh to cover the end of the gutter. Use tin snips to break it off or pliers to bend the mesh down and tuck it inside.
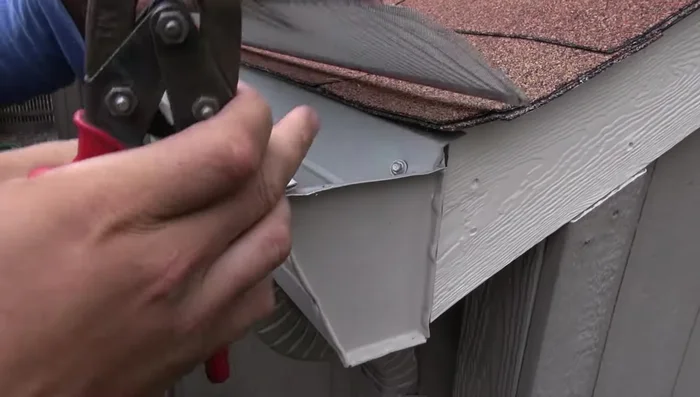
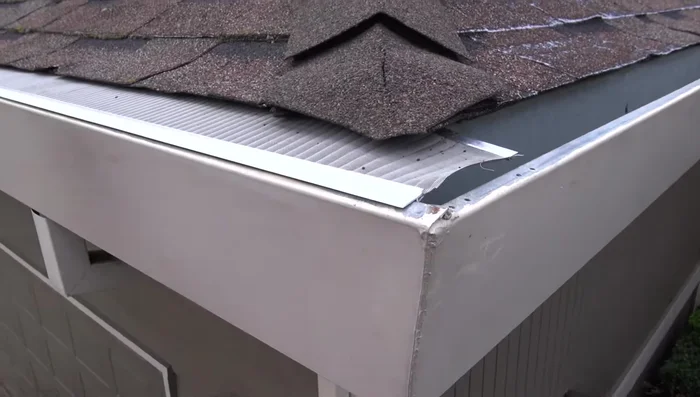
Installing Endcaps Installing Outside Corners
- For outside corners, let the mesh run long to the end of the gutter. Bend the back aluminum extrusion into the gutter; no cutting is necessary. Mark the adjoining piece at the same angle as the roof ridge and use tin snips to cut.
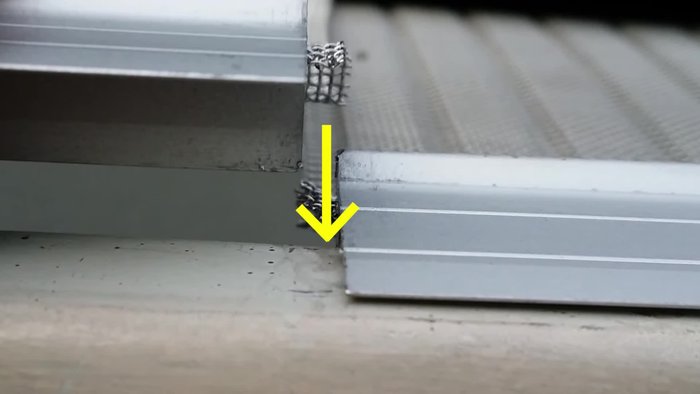
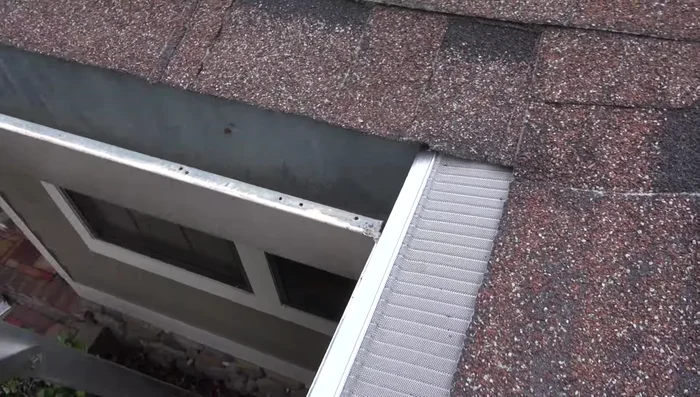
Installing Outside Corners Installing Inside Corners
- For inside corners, slide a section flush to the back corner. Cut the adjoining piece the same way as the endcap, cutting both aluminum strips back about an inch so the mesh covers the gap.
Installing Inside Corners

Read more: DIY Roof, Shingle, Fence, and Flashing Repair with Henry Wet Patch 208
Tips
- Covering the gutter ends with mesh helps keep out birds, rodents, and insects.
- Old shingles are brittle, so use extra care when working around them.
- The inside corner configuration allows for better rainwater penetration through the mesh, especially during heavy downpours. The mesh neatly covers the gap, preventing debris from passing through.