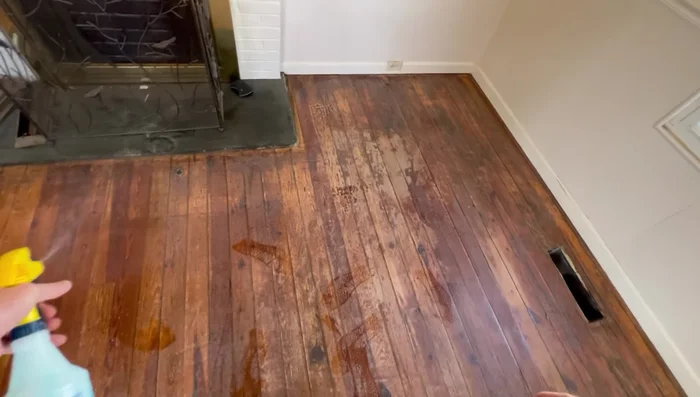
Hardwood floors add timeless elegance and value to any home, but over time, even the most durable finishes can show wear. Scuff marks, dullness, and a general lack of luster can diminish their beauty, leaving your floors looking tired and outdated. Fortunately, restoring your hardwood's original shine is often simpler and more affordable than you might think. A screen and recoat process, coupled with a thorough wax removal, can dramatically revitalize your floors, bringing back their rich color and natural brilliance. This is especially effective when dealing with built-up layers of old wax that prevent a new finish from properly adhering.
This simple yet effective technique can breathe new life into your hardwood floors, transforming them from drab to fab. Ready to see the amazing results for yourself? Let's dive into a step-by-step guide that will walk you through the entire screen and recoat process, including the crucial step of removing any existing wax buildup, ensuring a flawless and long-lasting finish.
Preparation and Safety Guidelines
- Stripping agent
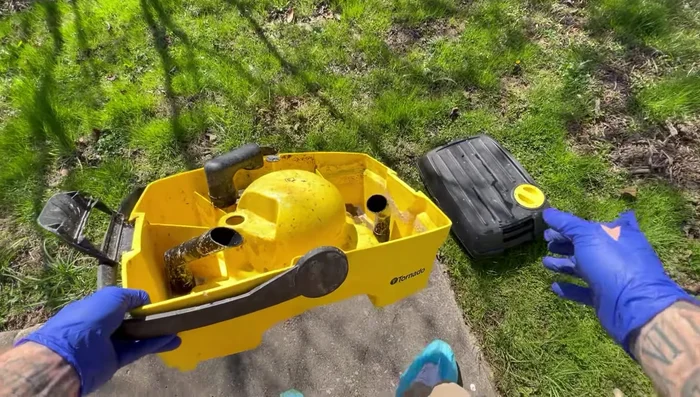
- Screen machine
- Floor cleaning solution
- Polyurethane
- Mops
- Rollers
- Always wear appropriate safety gear, including a respirator mask to avoid inhaling dust and fumes, safety glasses to protect your eyes, and gloves to protect your skin.
- Ensure adequate ventilation in the work area. Open windows and doors, and consider using fans to circulate air. The fumes from solvents and finishes can be harmful.
- Test any cleaning solution or finish in an inconspicuous area first to check for color changes or damage to the wood before applying it to the entire floor.
Step-by-Step Instructions
Wax Removal
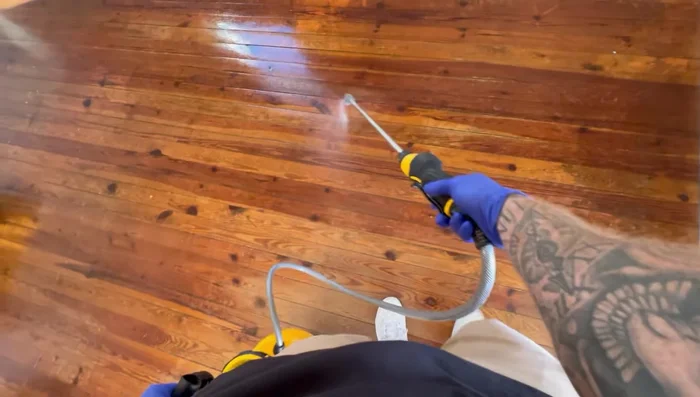
- Apply stripping agent to emulsify and loosen the acrylic wax buildup.
- Allow the stripping agent to sit for 10-15 minutes to fully emulsify the wax.

Wax Removal Surface Preparation
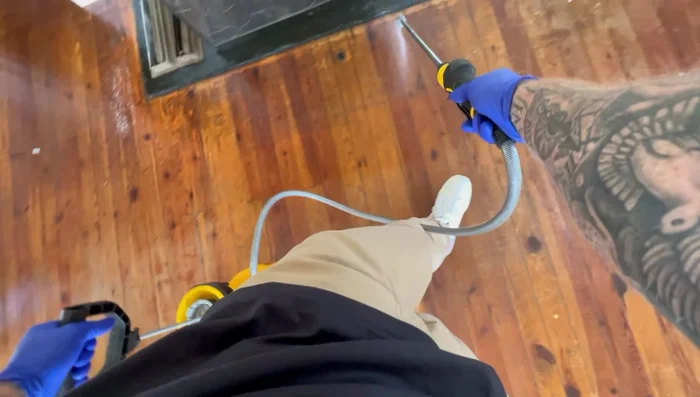
- Use a screen machine to remove the old polyurethane topcoat. This will be aggressive due to the floor's condition.
- Thoroughly clean the floor to remove any remaining wax residue, dirt, or debris.
- Apply a preparatory floor cleaning solution to prepare the surface for the new topcoat.
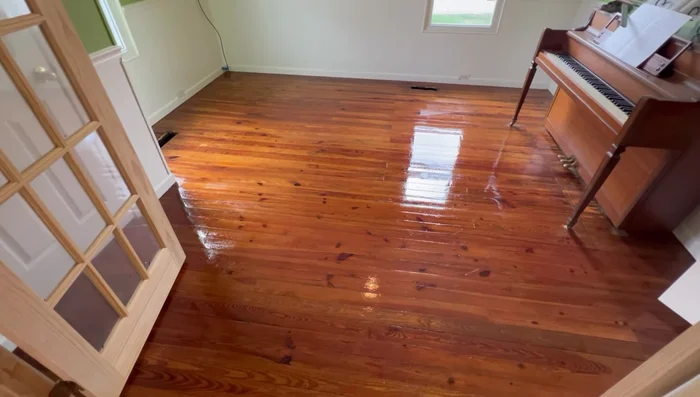
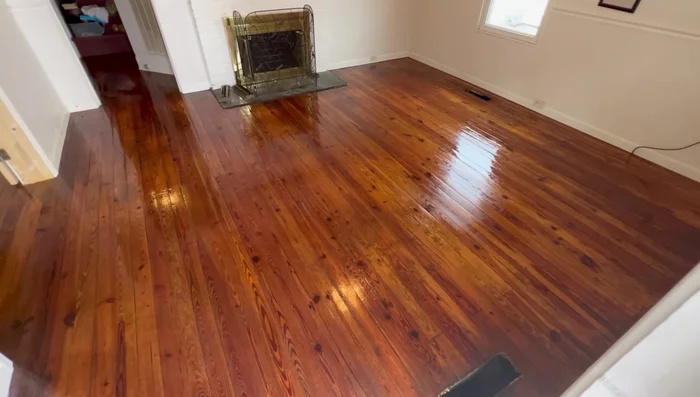
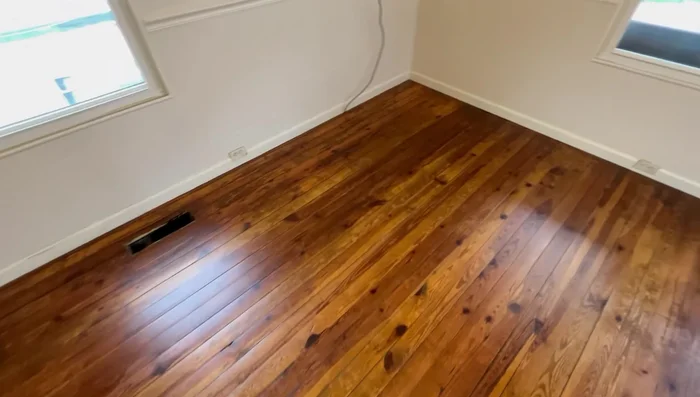
Surface Preparation Polyurethane Application
- Apply the first coat of polyurethane, paying attention to edges and corners.
- Allow the first coat to dry completely.
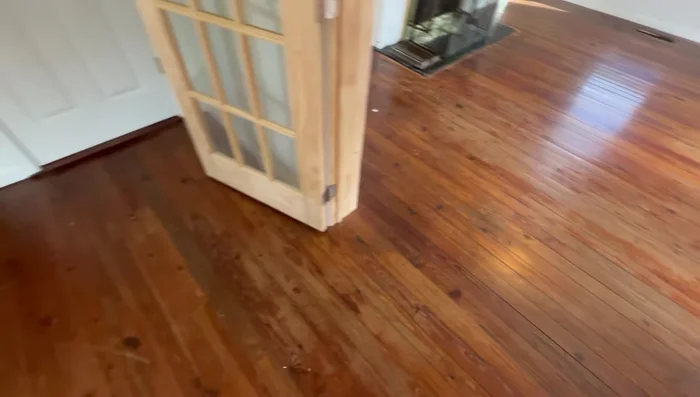
- Apply a second coat of polyurethane for a smooth, even finish. This coat levels and evens out the sheen.
Polyurethane Application
Read more: Fixing Drywall Nail Pops: A Quick and Easy DIY Guide
Tips
- Identify and remove acrylic wax buildup before proceeding. Using products like rejuvenate or Bona polishes can lead to costly wax removal later.
- Screen and recoat is a cost-effective solution compared to full sanding and refinishing, but it will not result in perfect floors. Manage client expectations accordingly.
- A thorough cleaning is crucial to ensure proper adhesion and prevent premature bond failure.
- Consider screen and recoat as part of a regular maintenance plan (every 3-5 years) to prevent the need for expensive full refinishing.