Linoleum flooring, once a staple in homes across the globe, offers durability and affordability. However, time and wear can take their toll, often manifesting as unsightly curling seams that detract from the overall appearance of your floor. Repairing these seams can seem daunting, leading many homeowners to consider costly professional repairs or even complete floor replacement. But what if we told you that fixing those pesky curling linoleum seams is a simple DIY project, saving you both time and money? Don't let a few lifted edges ruin your floors!
This guide provides a clear and concise step-by-step process to effectively repair curling linoleum seams, transforming a frustrating problem into a manageable task. From identifying the cause of the curl to selecting the right adhesive and applying it correctly, we'll equip you with the knowledge and confidence to tackle this common flooring issue. Ready to get started and restore your linoleum’s smooth, even surface? Let's dive into the detailed instructions below.
Preparation and Safety Guidelines
- Hair dryer
- Putty knife (for adhesive application)
- Scraper
- All-purpose adhesive
- Wet rag
- Rolling pin
- Wax paper
- Piece of flat wood
- Weights (bricks, cinder blocks, etc.)
- Always work in a well-ventilated area. Linoleum adhesives and solvents can release harmful fumes.
- Wear appropriate safety gear, including gloves and eye protection, to prevent contact with adhesives and sharp tools.
- Use caution when handling sharp tools like utility knives. Cut away from yourself and ensure a stable work surface.
Step-by-Step Instructions
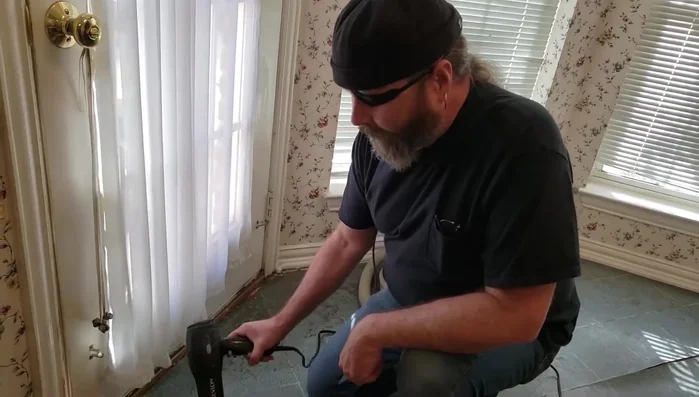
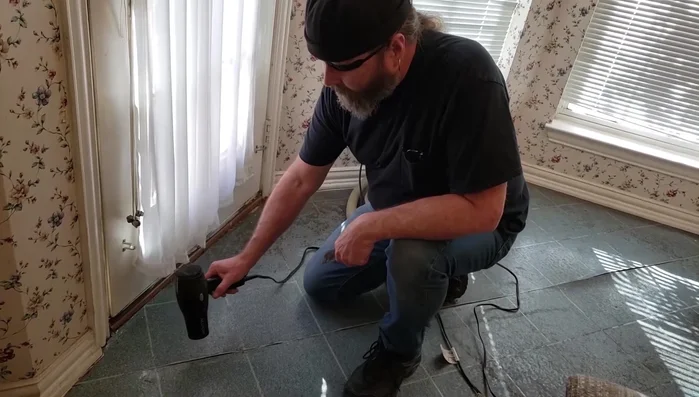
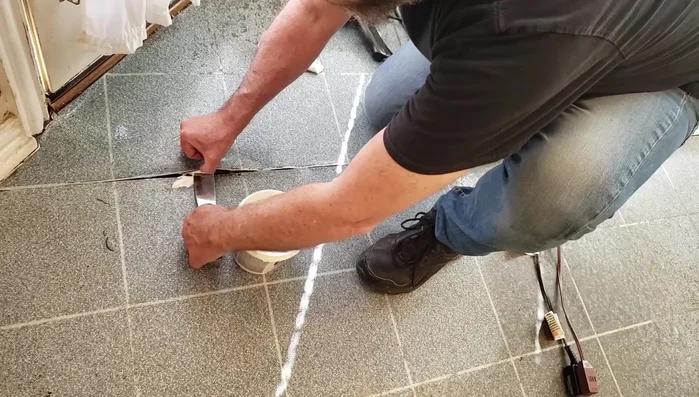
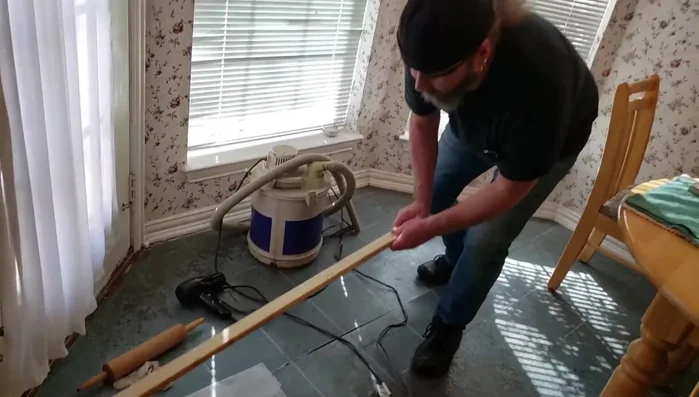
Prepare the Seam
- Heat and loosen the curled linoleum using a hair dryer.
- Gently lift the curled edges using a putty knife, being careful not to tear the linoleum.
- Clean out old adhesive and debris from underneath the separated linoleum seam using a scraper.

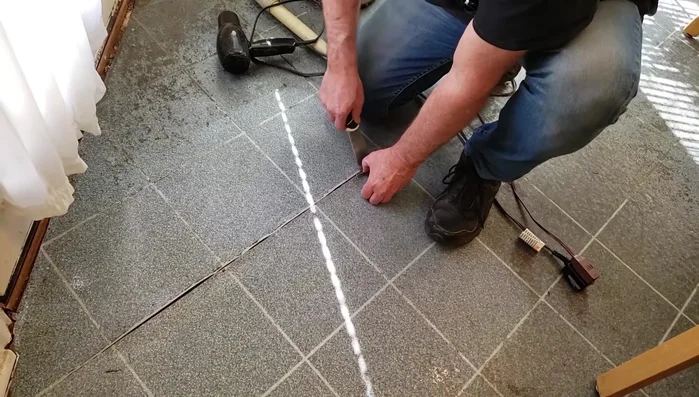
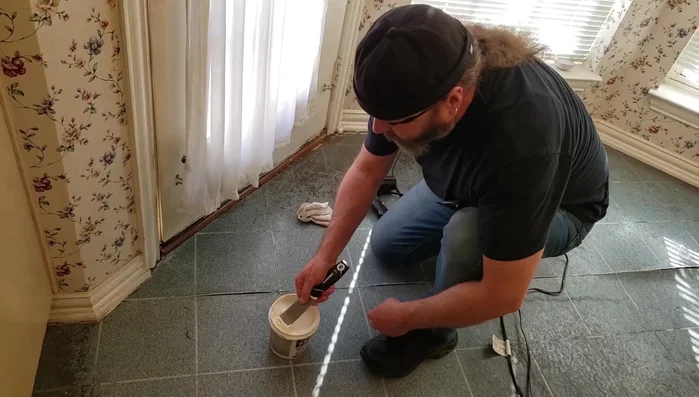
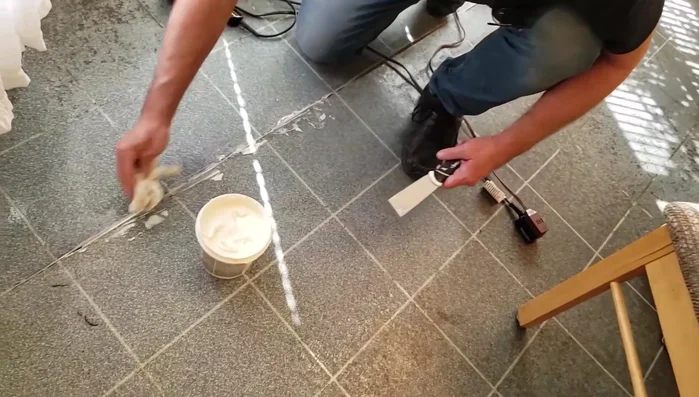
Prepare the Seam Apply Adhesive
- Apply all-purpose adhesive to the back of the linoleum edges using a putty knife.
- Work the adhesive underneath the linoleum edges, ensuring good contact.
- Wipe off excess adhesive with a damp (not wet) rag.
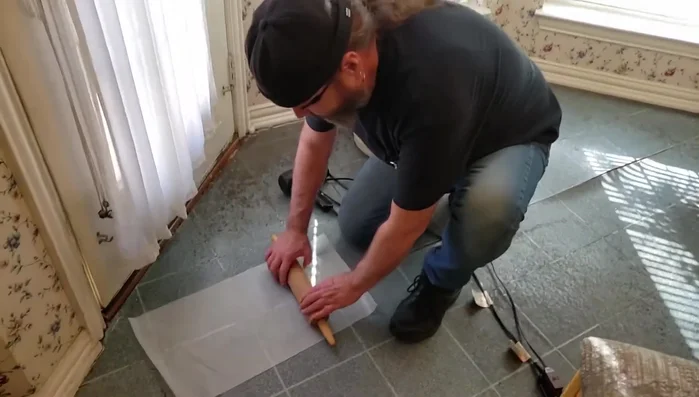
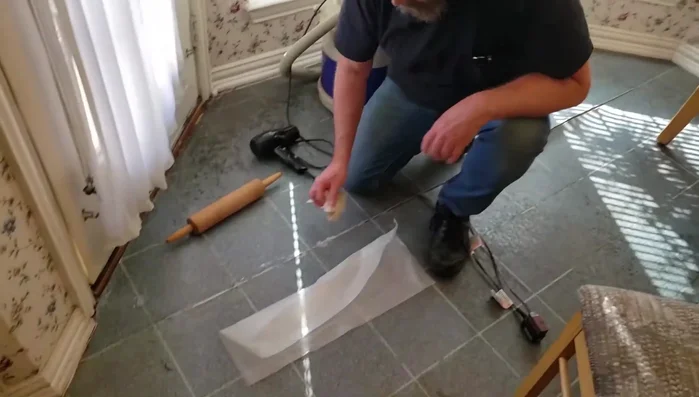
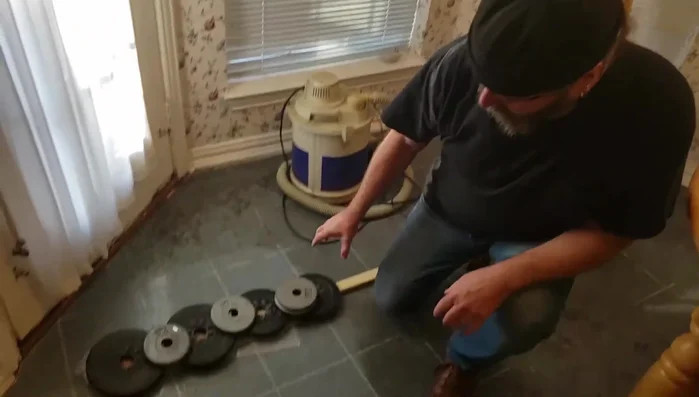
Apply Adhesive Secure and Cure
- Roll the linoleum down firmly using a rolling pin over wax paper to ensure even adhesion.
- Clean up any excess glue that squeezes out from under the seam.
- Place a flat piece of wood over the seam and apply significant weight (bricks, cinder blocks, etc.) for at least 12 hours to allow the adhesive to cure.
Secure and Cure Final Inspection and Sealing
- After 12 hours, remove weights and inspect the repair. Fill any small gaps with caulk to prevent moisture and debris intrusion.
Final Inspection and Sealing
Read more: Fixing Drywall Nail Pops: A Quick and Easy DIY Guide
Tips
- Use a hair dryer to make the linoleum pliable before lifting the edges.
- Be gentle to avoid tearing the linoleum while prying up the edges.
- Use an all-purpose adhesive suitable for linoleum or a tile adhesive for best results. Avoid using just any adhesive.
- Use a damp rag, not a wet one, to clean excess glue to prevent water damage.
- Apply substantial weight to the wood board for at least 12 hours to ensure proper adhesion.