Outdoor ceiling fans offer a refreshing breeze on hot summer days, creating a more comfortable and enjoyable outdoor living space. They're a fantastic upgrade, especially when replacing an existing outdoor light fixture that lacks the cooling power you crave. However, the installation process might seem daunting if you're not familiar with electrical work. Don't worry, though! Replacing a light fixture with an outdoor ceiling fan is a manageable DIY project, even for those with limited electrical experience, provided you take the necessary safety precautions and follow the instructions carefully. This seemingly complex task can be broken down into straightforward steps.
This guide provides a clear, step-by-step process for safely and effectively installing an outdoor ceiling fan in place of a pre-existing light fixture. From safely disconnecting the power to connecting the new fan's wiring, we'll walk you through each stage, ensuring you have the confidence to complete this project successfully and enjoy the cool comfort of your new outdoor fan. Let's get started!
Preparation and Safety Guidelines
- Outdoor fan rated for outdoor use
- Voltage tester
- Fine grit sandpaper
- Wire strippers
- Wire nuts
- Always turn off the power to the circuit at the breaker box before starting any work. Failure to do so could result in serious injury or death.
- Use appropriate safety equipment, including insulated gloves and eye protection, throughout the installation process.
- Ensure the mounting box is securely attached to a structural member of the ceiling and is rated for the weight of the fan. A weak mounting box can cause the fan to fall.
Step-by-Step Instructions
Safety First: Power Off
- Turn off the power breaker to the light fixture.

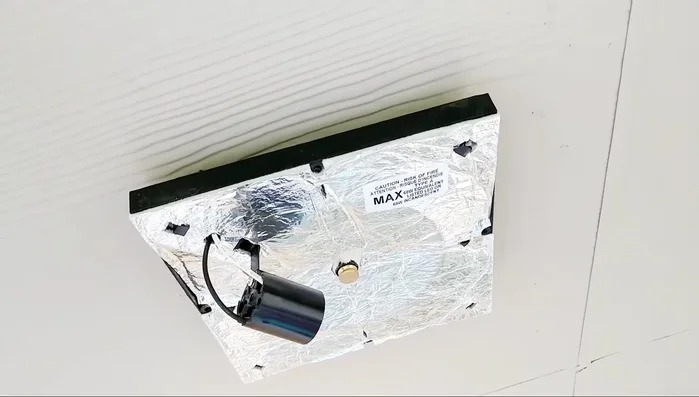
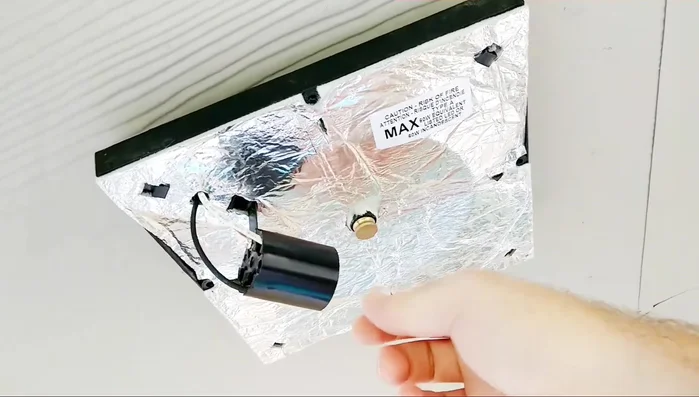
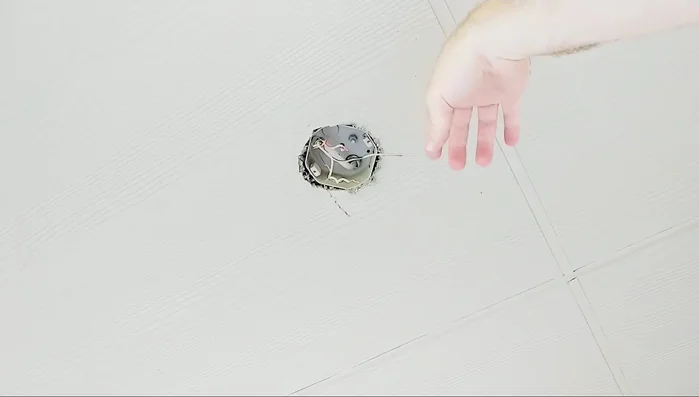
Safety First: Power Off Remove Existing Fixture
- Remove the old light fixture. Unscrew the thumb screw and remove the screws holding the fixture.
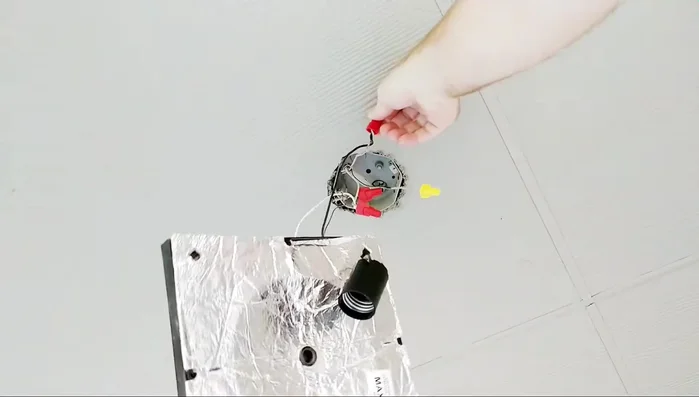
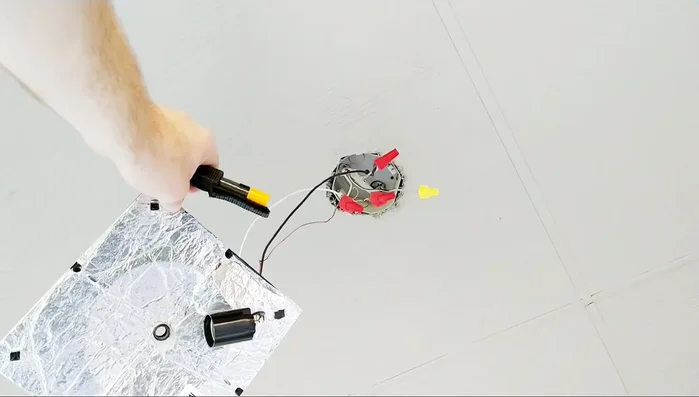
Remove Existing Fixture Inspect and Prepare Wiring
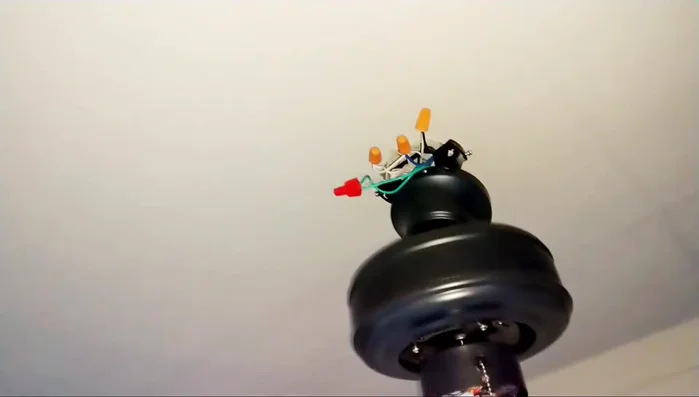
- Check the wiring. Verify power is off using a voltage tester. Identify the red (light), black (fan), white (neutral), and green (ground) wires.
- Clean the ground wire. Remove any paint from the ground wire to ensure a good connection.
Inspect and Prepare Wiring Install Mounting Bracket
- Install the mounting bracket. Use the screws from the old light fixture to attach the mounting bracket to the electrical box. Ensure the box is rated for the weight of the fan.
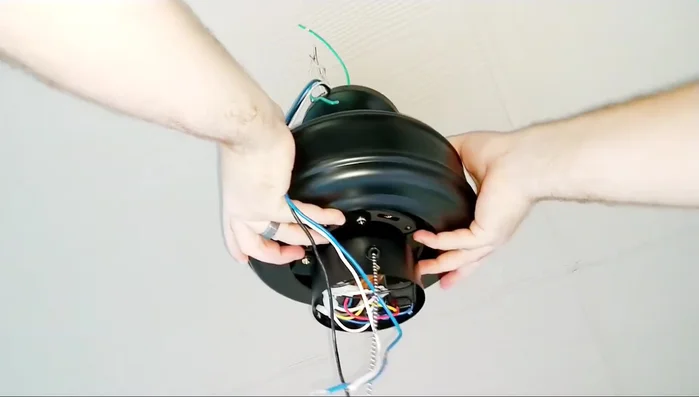
Install Mounting Bracket Attach the Fan
- Attach the fan's mounting rod to the bracket.
- Secure the fan to the mounting bracket. Connect the ball-type mounting system provided with the fan, ensuring no wires are pinched.
Attach the Fan Prepare Fan Wiring
- Prepare the fan wires. Strip insulation from the fan wires and cut away excess length.
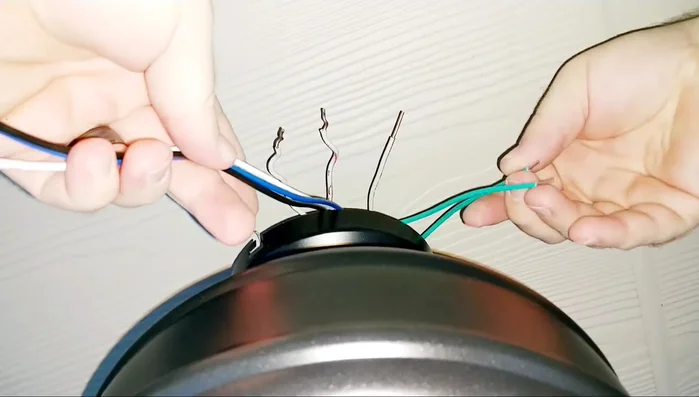
Prepare Fan Wiring Wire the Fan
- white to white, black to black, blue (fan) to red (light), and all ground wires together. Use wire nuts, twisting clockwise. Push wires firmly into wire nuts.
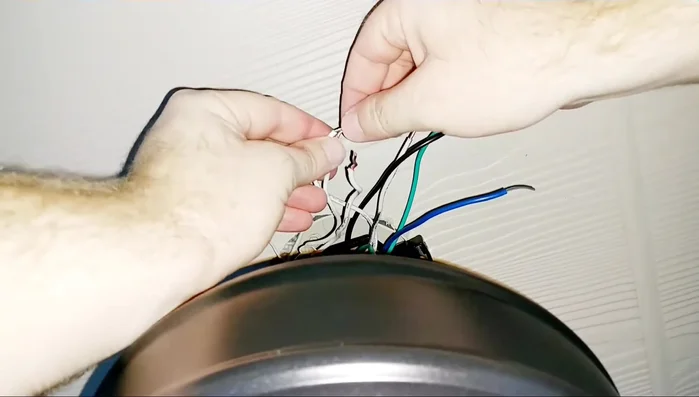
Wire the Fan Secure Wiring
- Tuck away wires. Neatly tuck and secure all wires to prevent pinching and rubbing.
Secure Wiring Install Cover Plate
- Install the fan cover. Secure the cover plate to hide the wiring.
Install Cover Plate Power On and Test
- Turn on the power and test the fan.
Power On and Test


Read more: Installing an Outdoor GFCI Receptacle: A Step-by-Step Guide
Tips
- Before starting, verify the fan is rated for outdoor use.
- Always check the electrical box in the attic to ensure it is secure and rated for a ceiling fan.
- Always use a voltage tester to ensure power is off before working with electrical wiring.
- Twist wires clockwise when using wire nuts.
- Ensure wires are firmly seated in wire nuts and check for tightness after installation.