The delicate beauty of antique chairs, often crafted from exquisite veneers, can be tragically marred by damage. Scratches, chips, and even significant losses of veneer can render a cherished piece unusable or, at the very least, visually diminished. Traditional repair methods can be intrusive and sometimes even irreversible, leaving behind telltale signs of intervention. However, a less destructive and surprisingly effective technique exists: patchwork veneer repair. This unique approach, detailed below, allows for the restoration of damaged veneer with a minimum of disruption, often resulting in a repair that is virtually invisible to the untrained eye.
This method utilizes meticulously selected and shaped pieces of veneer to seamlessly integrate with the existing surface, creating a cohesive and durable repair. It's a fascinating blend of artistry and precision, requiring patience and careful attention to detail. To learn this innovative approach to chair restoration, follow the detailed step-by-step process in the sections that follow.
Preparation and Safety Guidelines
- Iron-on edge banding
- Sandpaper (various grits)
- Boiled linseed oil
- Polycrylic satin finish
- Utility knife
- Iron
- Always wear appropriate safety glasses and a dust mask when working with wood, especially during sanding and gluing.
- Use clamps to ensure even pressure and prevent warping when applying the veneer patches. Avoid over-clamping which can damage the wood.
- Sharp tools like chisels and knives are necessary for precise work. Handle them with extreme care to avoid injury.
Step-by-Step Instructions
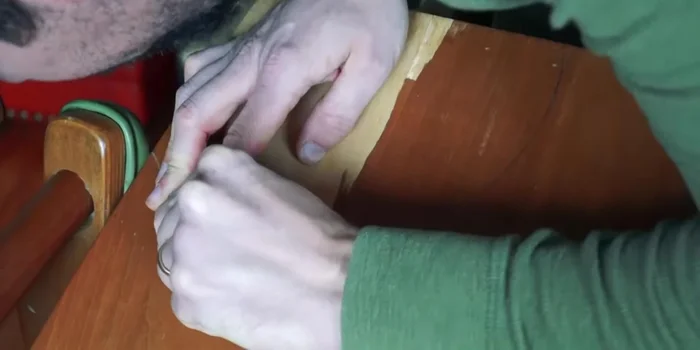
Prepare the Damaged Area
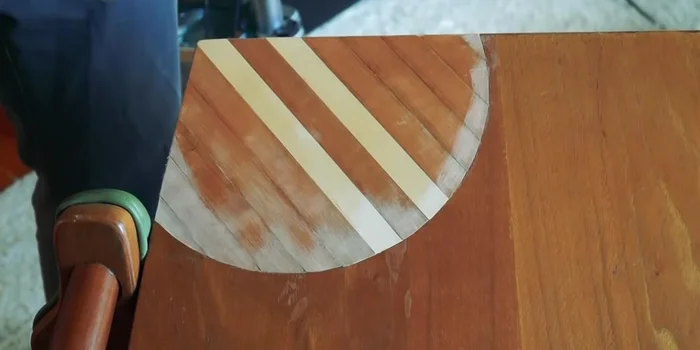
- Trace and cut a circle (or desired shape) on the damaged area of the chair's lamination.

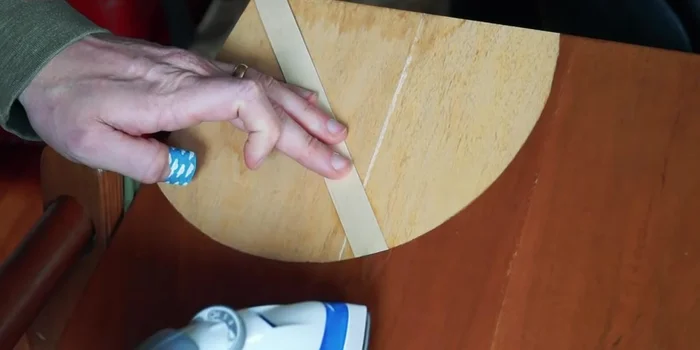
Prepare the Damaged Area Cut and Prepare Veneer Patches
- Cut iron-on veneer strips to fit the shape you've cut, creating a patchwork design.
Cut and Prepare Veneer Patches Apply Veneer Patches
- Carefully apply the iron-on veneer strips, using an iron to adhere them to the chair. Avoid burning the chair's finish by ironing from different directions.
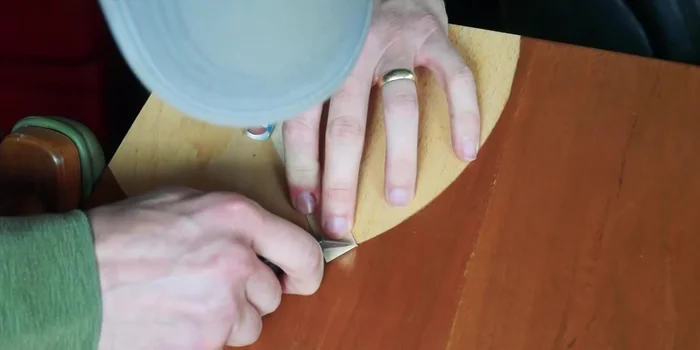
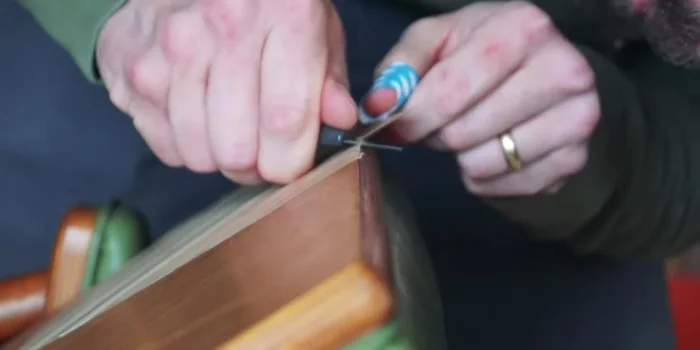
Apply Veneer Patches Trim Excess Veneer
- Cut away any excess veneer, ensuring a flush fit with the chair.
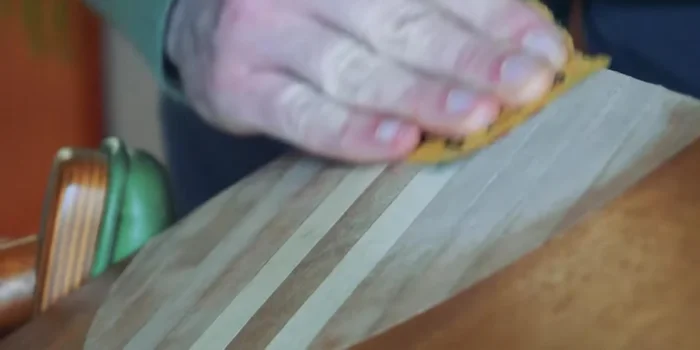
Trim Excess Veneer Sand and Smooth
- Sand the repaired area to smooth out the surface, starting with coarser grit sandpaper and finishing with finer grit.
Sand and Smooth Finish and Seal
- Apply a layer of boiled linseed oil, followed by several layers of polycrylic satin finish, sanding lightly between each layer to achieve a smooth, even finish.
Finish and Seal
Read more: Silence that Squeaky Bed: A Complete Fix-It Guide
Tips
- Iron from multiple directions to avoid burning the chair's finish.
- Use multiple layers of finish and sand between layers for a smooth and even result. Pay close attention to the edges to blend the new veneer seamlessly.
- Choose a shape for the veneer patches that will make the repair both noticeable and visually appealing.