Sagging floors are a common yet frustrating problem in older homes, often indicating underlying structural issues that can compromise the safety and stability of your entire house. This unsettling dip can range from a minor annoyance to a significant structural defect, potentially leading to cracks in walls, sticking doors, and even more extensive damage if left unaddressed. Ignoring the problem only allows it to worsen, potentially increasing repair costs significantly down the line. A sagging floor can be more than just an aesthetic issue; it's a critical structural concern requiring prompt attention.
Understanding the causes and implementing the correct repairs is crucial for restoring your home's integrity and ensuring the safety of your family. This step-by-step guide will walk you through the process of diagnosing the problem, identifying the source of the sag, and effectively repairing your sagging floors, providing you with the knowledge and confidence to tackle this common home repair project.
Preparation and Safety Guidelines
- Lumber
- Support Jacks
- Steel Shims
- Steel Beams
- Safety First: Always wear appropriate safety gear, including safety glasses, gloves, and a dust mask. If working at heights or with power tools, use proper fall protection and follow all manufacturer instructions.
- Structural Assessment: Before starting any repairs, consult a qualified structural engineer or contractor to assess the extent of the damage and determine the appropriate repair method. Improper repairs can worsen the problem.
- Load Reduction: While making repairs, minimize the load on the sagging floor. Remove heavy furniture and avoid placing any additional weight on the affected area until repairs are complete.
Step-by-Step Instructions
Assess the Damage
- Identify the cause of the sagging (rotted wood, broken joists, inadequate support, etc.)

Assess the Damage Repair Localized Damage
- This is the most common and often the least expensive approach if the damage is localized.
Repair Localized Damage Reinforce Joist Support
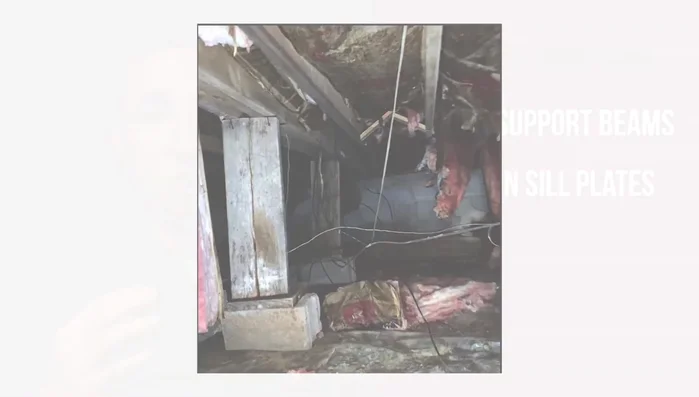
- If joists are sagging between the beam and exterior wall, add support beams to prevent further sagging.
Reinforce Joist Support Stabilize the Main Beam
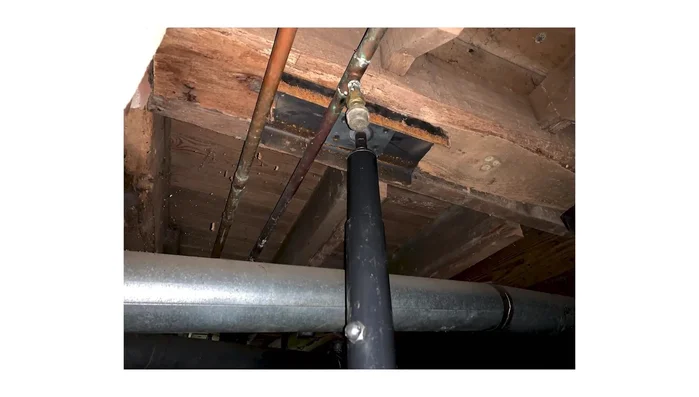
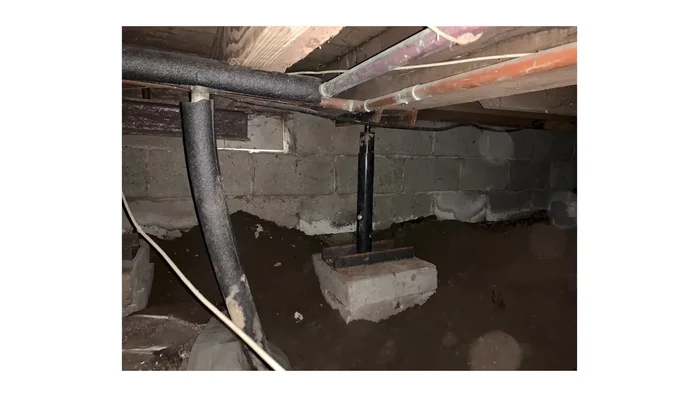
- If the main beam is sagging, use support jacks and steel shims to lift and stabilize it. This is more involved but necessary for significant sags.
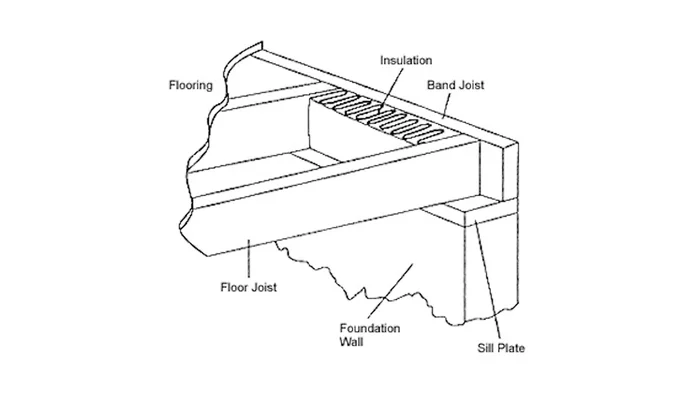
Stabilize the Main Beam Address Foundation Problems
- If sagging is due to foundation problems (e.g., rotted sill plates), repair or replace the affected foundation components. This often requires a professional.
Address Foundation Problems Install Steel Beam (Severe Cases)
- For severe sagging between the main beam and foundation, installing a steel beam across floor joists is the most robust solution.
Read more: Fixing Drywall Nail Pops: A Quick and Easy DIY Guide
Tips
- Moisture is a common cause of sagging floors. Address any moisture issues in your crawl space or basement to prevent future problems.
- Professional assessment is recommended, especially for extensive damage or foundation-related issues. This ensures proper diagnosis and repair.
- Costs can vary widely depending on the extent of the damage and the necessary repairs. Expect to spend anywhere from $1000 to $5000 or more for extensive repairs.