A leaky roof can be a homeowner's worst nightmare, and damaged slates are often the culprits. Repairing a slate roof might seem daunting, but with the right technique, it's a manageable DIY project, even for those without extensive roofing experience. This article focuses on the efficient and effective "slate ripper" method, a preferred technique amongst professional roofers for removing and replacing individual slate tiles without causing unnecessary damage to surrounding materials. This approach minimizes disruption and ensures a clean, lasting repair.
Forget clumsy prying and potential for further damage; the slate ripper method provides a precise and controlled way to tackle even the most stubbornly adhered slates. Understanding this specialized tool and its application is key to achieving a professional-looking finish. Ready to learn how to replace those damaged slates like a pro? Let's dive into the step-by-step guide.
Preparation and Safety Guidelines
- Slate Cutters
- Hammer
- Tin Snips
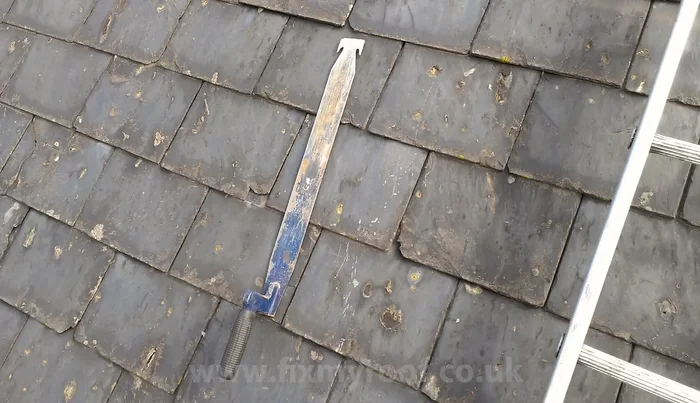
- Slate Ripper
- Always wear safety glasses and gloves. Slate is brittle and can shatter, causing eye and hand injuries.
- Use caution when working at heights. Use appropriate fall protection equipment if necessary. Never work alone on a roof.
- Dispose of broken slate responsibly. Many areas have specific regulations for construction waste, including slate.
Step-by-Step Instructions
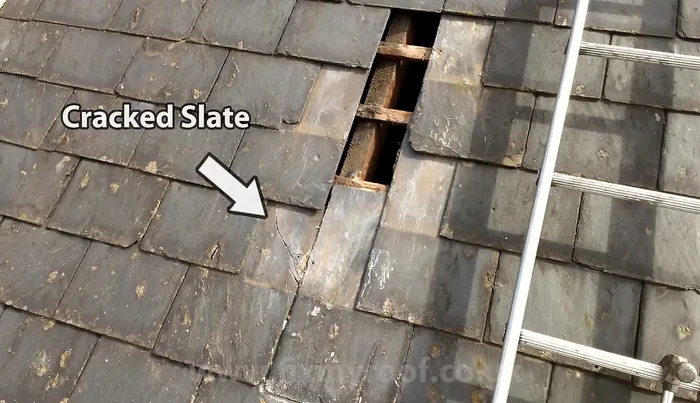
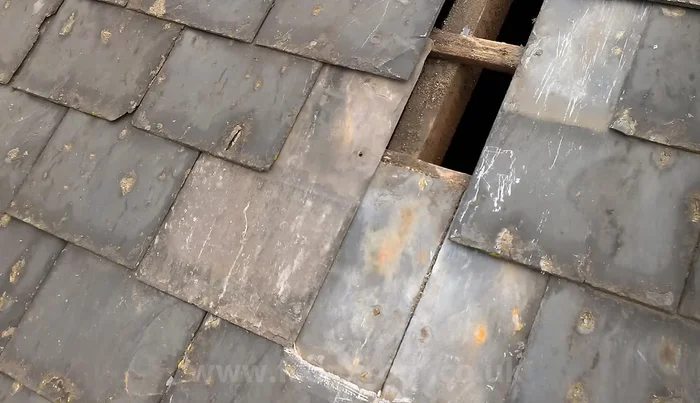
Locating and Assessing Damage
- Locate the damaged area. Identify the slates needing replacement, starting just above the suspected leak and working downwards.
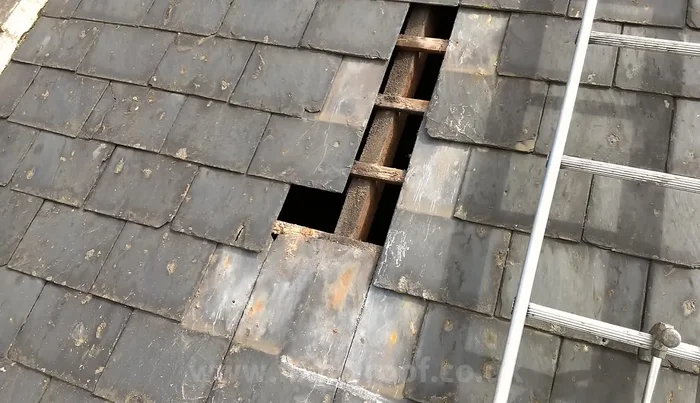
- Inspect the underlying structure for further damage (cracks, sealant issues).

Locating and Assessing Damage Removing Damaged Slates
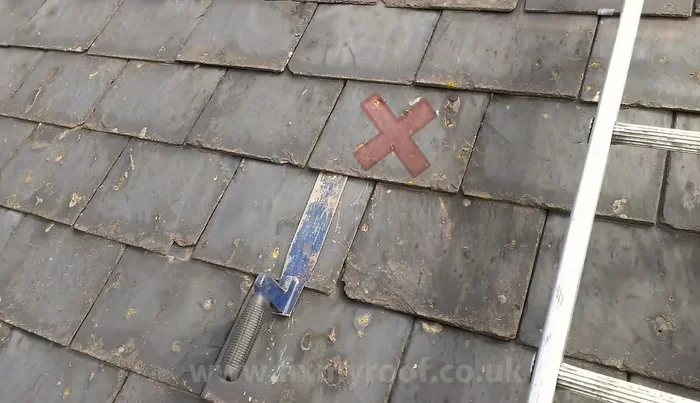
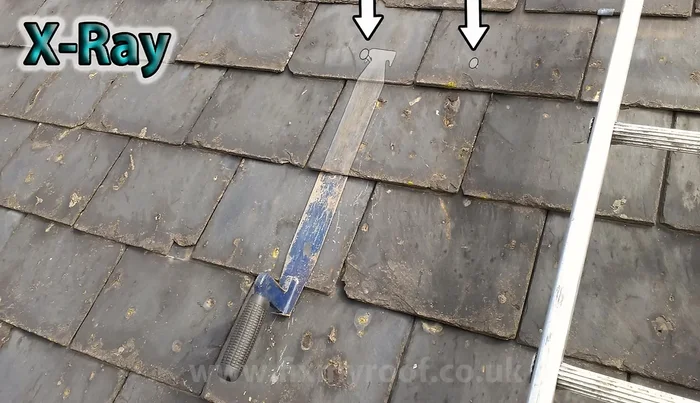
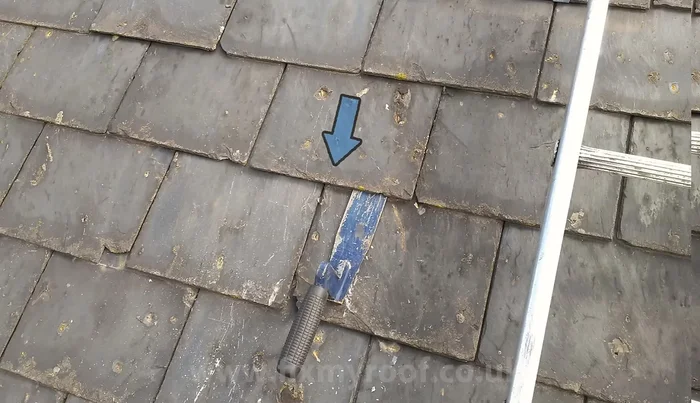
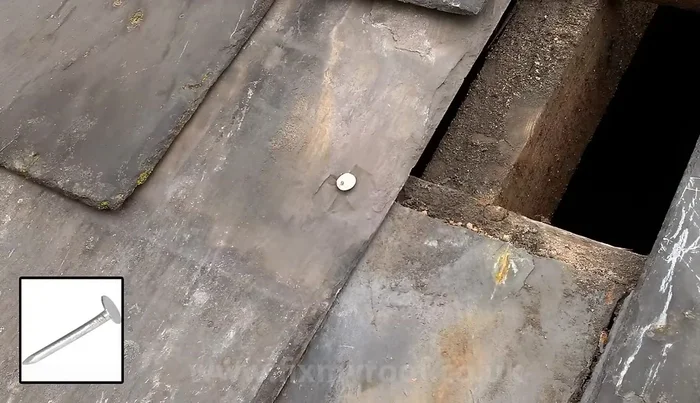
- Insert the Slate Ripper under the first slate to be removed.
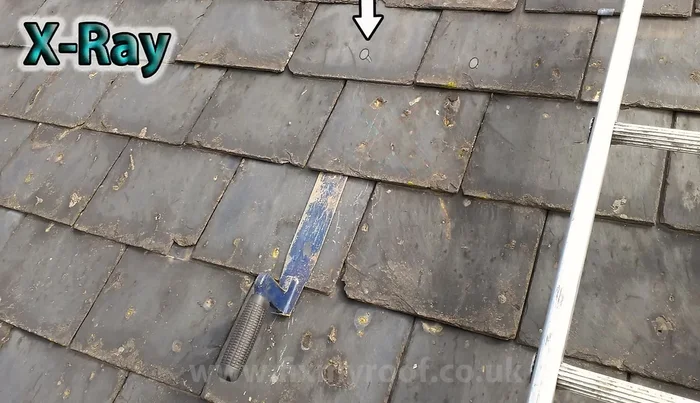
- Locate the nails securing the slate using the Slate Ripper (the video uses a visual aid).
- Remove the nails by hammering the Slate Ripper handle downwards to pull or cut them out. Repeat for each nail.
- Remove the slate using the Slate Ripper to gently pry it free.
Removing Damaged Slates Preparing Replacement Slates
- Clean the area and remove any old sealant or damaged material.
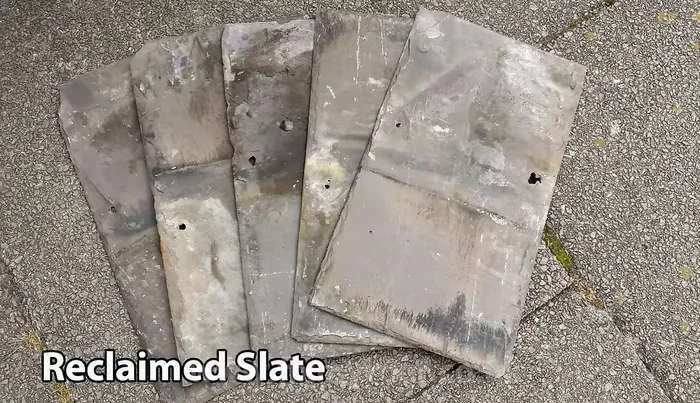
- Prepare and measure replacement slates. (The video explains how to determine sizes and obtain appropriate replacements from a roofing yard).
Preparing Replacement Slates Installing Replacement Slates
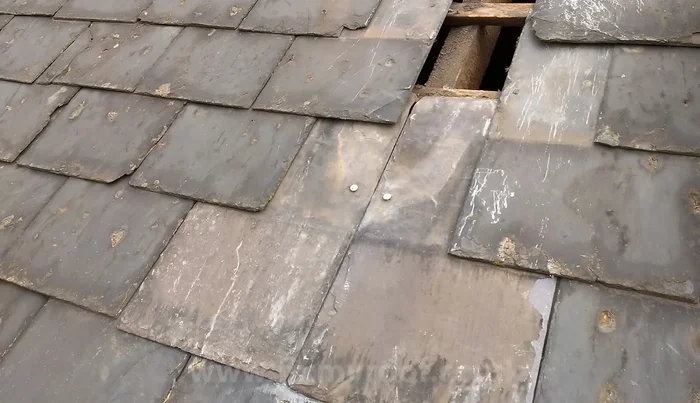
- Insert the new slate, ensuring it rests correctly on the underlying battens (lays).
- Nail the slate into place using galvanized, copper, or aluminum clout nails. Avoid over-tightening or under-tightening nails.
- Trim any excess slate to ensure a perfect fit.
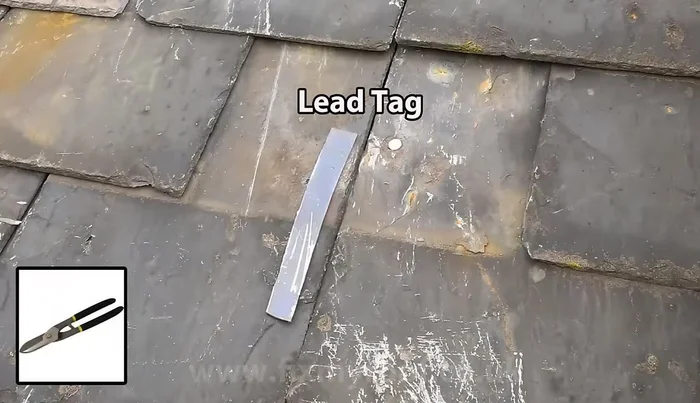
- Repeat steps 9-11 for remaining slates, using the lead tag method for the final slate if necessary.
Installing Replacement Slates
Read more: DIY Roof, Shingle, Fence, and Flashing Repair with Henry Wet Patch 208
Tips
- Keep the Slate Ripper low to the slates to minimize damage to surrounding slates.
- For enlarged or damaged nail holes, use a titanium-coated HSS drill bit to accurately create new holes, preventing slate breakage.
- Consider adding an extra nail to the top edge of gable-end or valley slates for extra security against swiveling.