Adding electrical sockets to existing brick walls can seem daunting, especially for the DIY enthusiast. However, with the right tools and a methodical approach, installing a spur socket – a socket fed from an existing circuit – is a manageable task that can significantly enhance the functionality of your home. Whether you're adding power to a workshop, upgrading your kitchen, or simply need an extra outlet in a less-than-convenient location, this guide will equip you with the knowledge and confidence to complete the job safely and efficiently.
This project requires careful planning and adherence to safety regulations to prevent electrical hazards. Understanding the underlying principles of electrical wiring is crucial before beginning. Let's delve into the detailed, step-by-step process that will walk you through every stage of adding a spur socket to your brick wall, from initial preparation to the final connection and testing.
Preparation and Safety Guidelines
- Socket Tester
- Neon Screwdriver
- Insulation Tape
- Drill with SDS Drill Bit (or standard drill bit)
- Hammer
- Damaged Screwdriver (or standard screwdriver)
- Chisel
- Spirit Level
- Galvanized Back Box
- Plaster Filler
- Filling Knife
- Sandpaper
- Paint
- Paintbrush
- Electrical Grommets
- 2.5mm Twin and Earth Cable
- MK Logic Plus Rapid Fix Socket
- Always use appropriate safety equipment, including eye protection, dust masks, and gloves. Brick dust is harmful and can cause eye irritation.
- Before drilling, locate and mark any electrical wiring, gas pipes, or water pipes in the wall to avoid damage and potential injury. Use a cable detector to ensure accuracy.
- Ensure the spur socket is correctly wired and complies with all relevant electrical regulations in your area. If unsure, consult a qualified electrician.
Step-by-Step Instructions
Safety First: Disconnecting Power
- Turn off the electricity at the consumer unit and double-check with a socket tester and neon screwdriver.

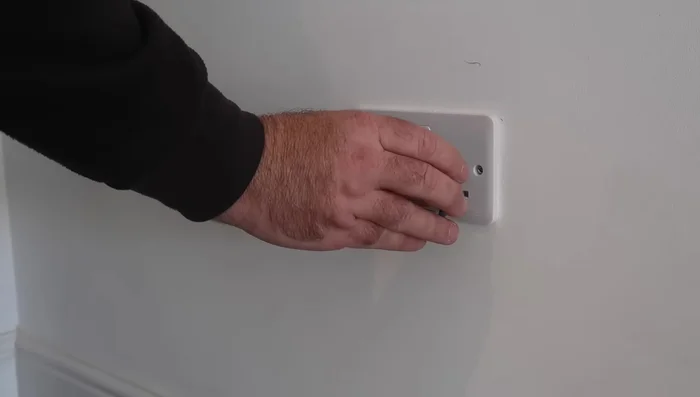
Safety First: Disconnecting Power Socket Removal and Preparation
- Remove the existing socket and tape up the wires to prevent accidental contact.
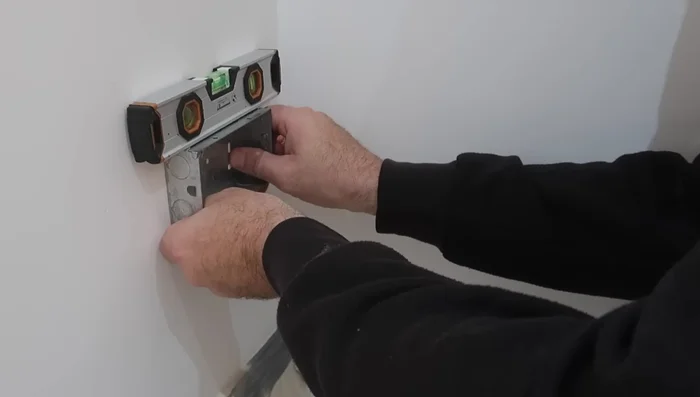
Socket Removal and Preparation Wall Assessment and Hole Drilling
- Assess the wall type. This video demonstrates a brick wall with plasterboard.
- Drill a hole through the brick wall using a drill bit slightly larger than the cable.
Wall Assessment and Hole Drilling Back Box Preparation
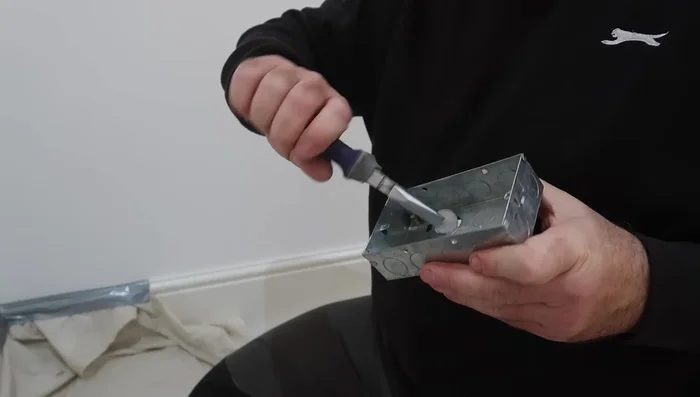
- Knock out a suitable plug from the new galvanized back box to align with the drilled hole.
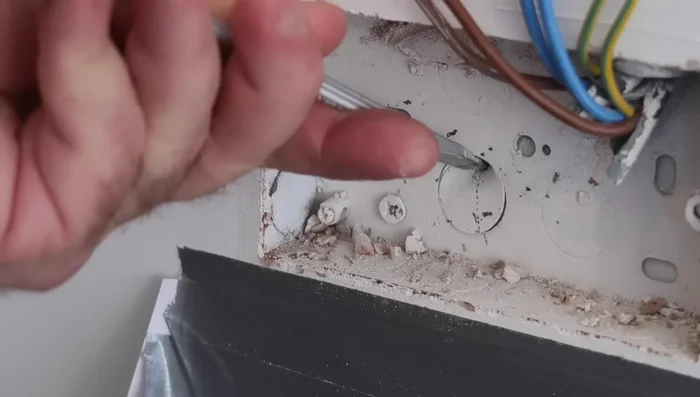
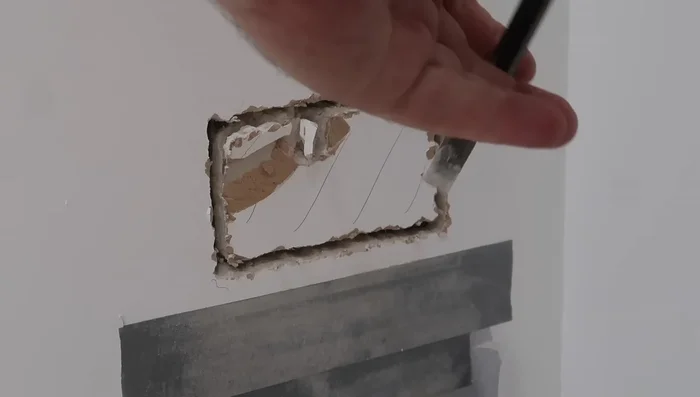
- Mark the back box perimeter and drill pilot holes around it using 'stitch drilling'.
- Use a chisel to carefully remove excess brick material around the hole to create a recess for the back box.
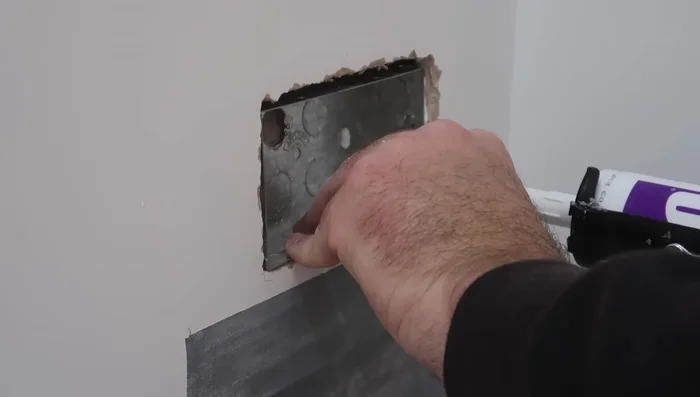
Back Box Preparation Back Box Installation and Finishing
- Apply plaster filler or adhesive to the back of the galvanized back box and carefully press it into the hole, ensuring it is level.
- Fill around the back box with plaster filler, ensuring a smooth surface.
- Allow the filler to cure overnight, then sand and paint the area.
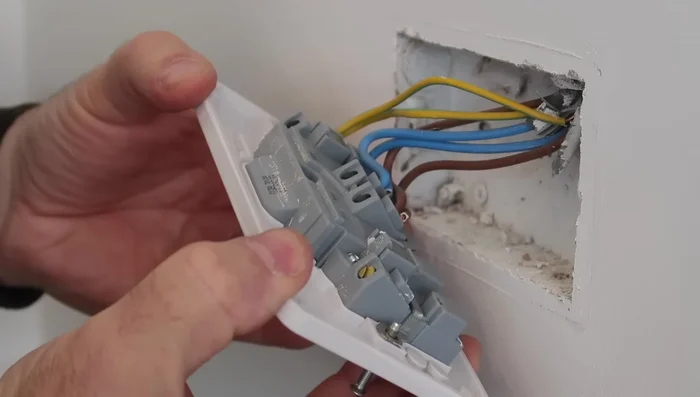
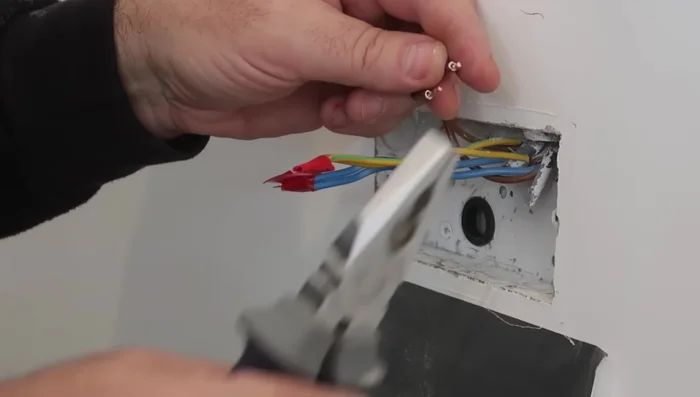
Back Box Installation and Finishing Cable Protection and Wiring
- Install electrical grommets in the knockout panels on both sides of the wall to protect the cables.
- Connect the new socket's wires to the existing ring circuit, using a rapid fix socket for ease of connection.
Cable Protection and Wiring Testing and Completion
- Test the new and existing sockets with a socket tester to confirm functionality.
Read more: Installing an Outdoor GFCI Receptacle: A Step-by-Step Guide
Tips
- Always turn off the electricity before working with sockets.
- Use a socket tester and neon screwdriver to double-check that the power is off.
- Use stitch drilling to create a neat hole for the back box.
- Glue the back box in place rather than screwing it directly into the rough hole.
- Use a rapid fix socket for easier wire connections and to ensure continuity in the ring circuit.