In a world increasingly conscious of sustainability, upcycling is more than just a trend; it's a mindful approach to reducing waste and breathing new life into discarded items. Old, forgotten chairs, often destined for landfills, possess a surprising potential for transformation. This article explores the rewarding process of converting these neglected pieces of furniture into unique and functional wall shelves, adding character and charm to any room. Giving new purpose to these often-overlooked items not only benefits the environment but also allows for creative expression and personalized home décor.
From rickety kitchen chairs to elegant dining room pieces, the possibilities are endless. By repurposing these chairs, you're not just creating stylish storage solutions, but also contributing to a more sustainable lifestyle. Ready to embark on this exciting upcycling adventure? Let's dive into the step-by-step guide to transforming your old chair into a stunning, functional wall shelf.
Preparation and Safety Guidelines
- Chair
- Luan
- Boards
- Paint (Dixie Belle Cotton)
- Paintbrushes
- Sandpaper
- Electric Sander (optional)
- Clear Wax or Polycrylic
- Transfer
- Screws
- Wood Glue
- Always wear safety glasses and a dust mask when sanding and working with old chair parts. Wood dust is harmful if inhaled.
- Ensure all screws and nails are securely fastened before mounting the chair to the wall. Improperly secured shelves can fall and cause injury or damage.
- Inspect the chair's structural integrity before beginning. If the chair is too damaged or weak, it may not be suitable for repurposing as a shelf and should be discarded properly.
Step-by-Step Instructions
Preparation and Shelf Construction
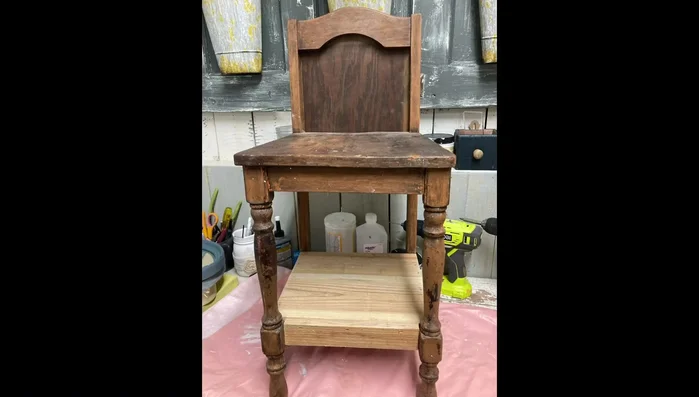
- Assess the chair's condition and determine the desired modifications. In this example, the chair is being converted into a wall shelf.
- Cut and attach boards to the bottom of the chair to form a lower shelf. Add a smaller board to the front for a finished look. A piece of luan is added to the back of the top opening to create a second shelf.

Preparation and Shelf Construction Painting and Finishing
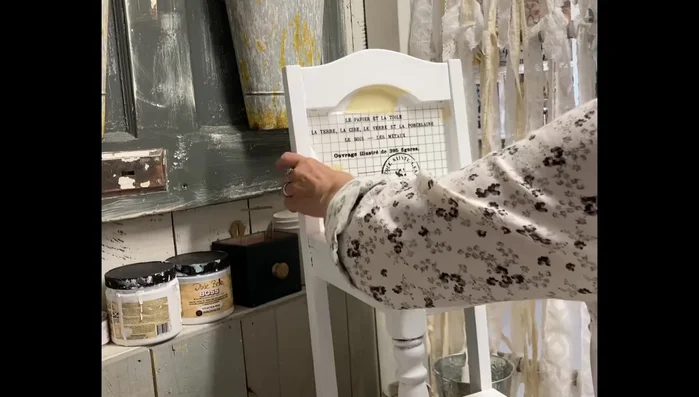
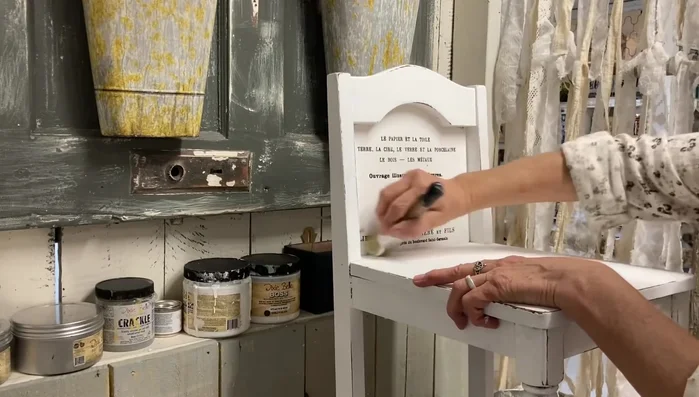
- Apply a stain-blocking primer (such as Dixie Belle Boss) followed by several coats of chalk paint (Dixie Belle Cotton).
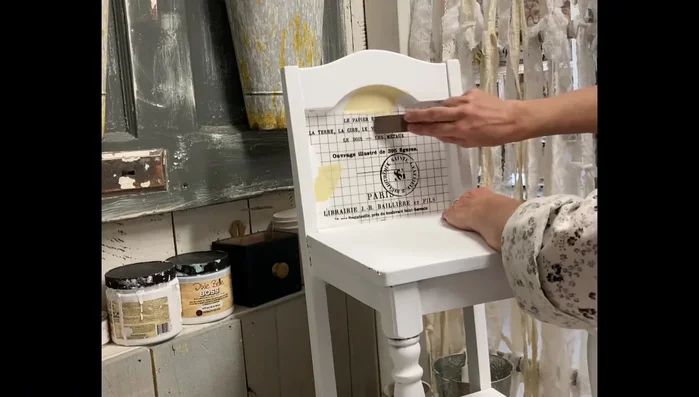
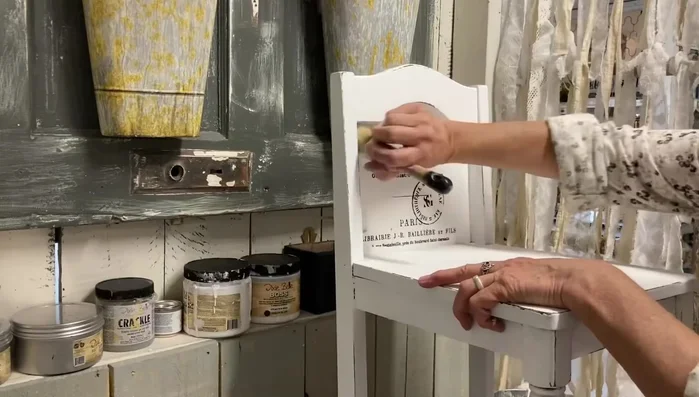
- Once the paint is dry, apply a decorative transfer to personalize the shelf. Choose a neutral transfer to maximize versatility.
- Seal the painted chair using either clear wax or a polycrylic/spray clear coat. Lightly distress the surface for a more rustic look (optional).
Painting and Finishing Installation
- Attach the completed chair/shelf to the wall using appropriate hardware.
Installation

Read more: DIY Upcycled Bed Frame: A Step-by-Step Guide
Tips
- Consider repurposing old luan for shelf construction.
- Choose neutral-colored transfers to maintain display flexibility.
- Use an electric sander for efficient distressing of larger projects.
- Adjust shelf dimensions as needed to create practical storage space.
- Consider alternative uses for upcycled chairs beyond shelving, such as towel racks.