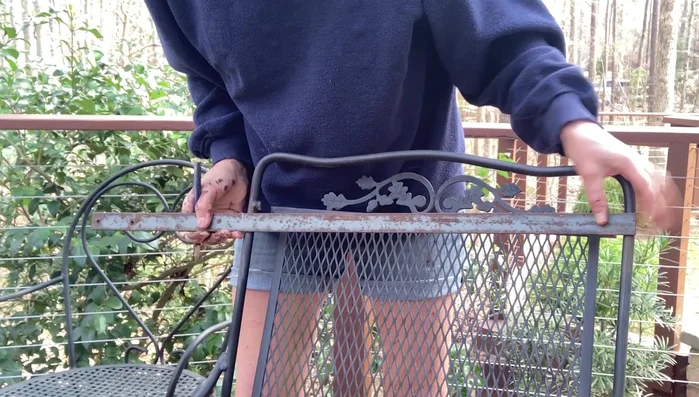
Wrought iron furniture, with its elegant curves and enduring strength, adds a touch of timeless charm to any space. However, the beauty of these pieces can be marred by the inevitable wear and tear of time, resulting in loose joints, rusty spots, or broken components. Replacing a damaged wrought iron chair can be surprisingly expensive, often outweighing the piece's initial value. Fortunately, with a little know-how and readily available materials, many repairs are entirely manageable as DIY projects. This guide will empower you to breathe new life into your cherished wrought iron chair without breaking the bank.
This article provides a comprehensive, step-by-step guide to repairing your wrought iron chair, focusing on budget-friendly solutions and easily accessible tools. From tackling loose welds and rust removal to replacing broken parts and applying a protective finish, we'll walk you through the entire process, enabling you to restore your chair to its former glory. Let's get started!
Preparation and Safety Guidelines
- Steel flat bar
- Mini circular saw with metal cutting blade
- 120 grit sandpaper
- Construction adhesive
- Black satin spray paint
- Always wear safety glasses and gloves to protect yourself from sharp edges and flying debris. Wrought iron can be brittle and prone to snapping.
- Use appropriate ventilation when working with paints, primers, or other chemicals. Fumes can be harmful.
- If you are unsure about any repair, consult a professional welder or metalworker. Attempting complex repairs without experience can lead to injury or further damage.
Step-by-Step Instructions
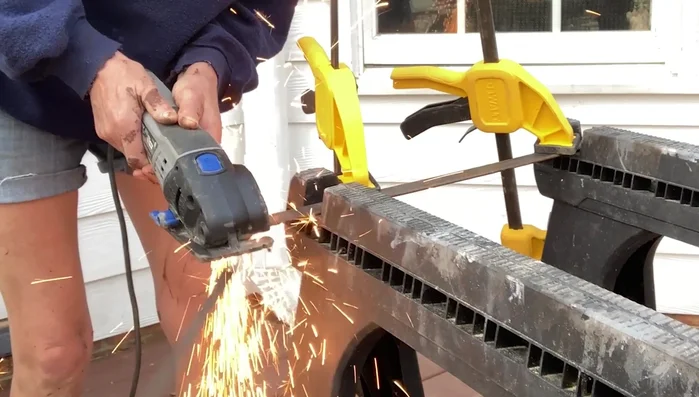
Prepare the Steel Bar
- Measure and mark the length of a steel flat bar to match the outside edges of the broken chair frame.
- Cut the steel bar to the marked length using a mini circular saw with a metal cutting blade. Remove any burrs and smooth the edges.
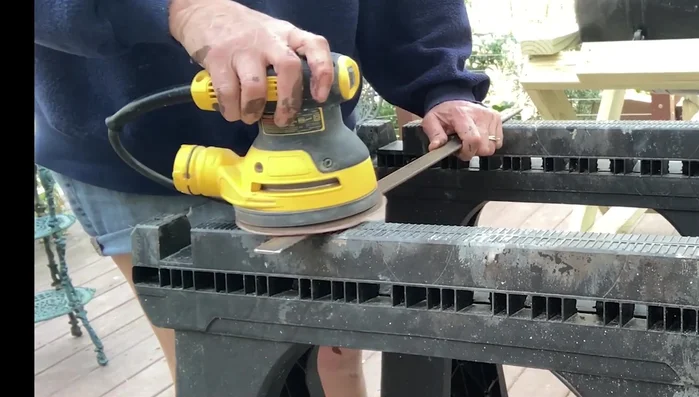
- Sand the steel bar (if necessary) with 120 grit sandpaper to remove rust and create a clean surface for the adhesive.
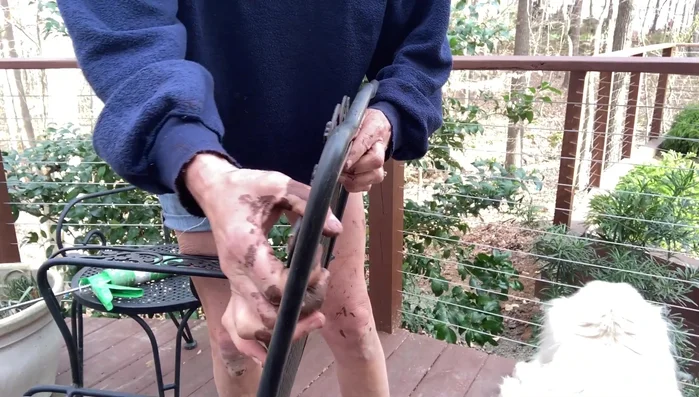
- Dry fit the steel bar to check the length.

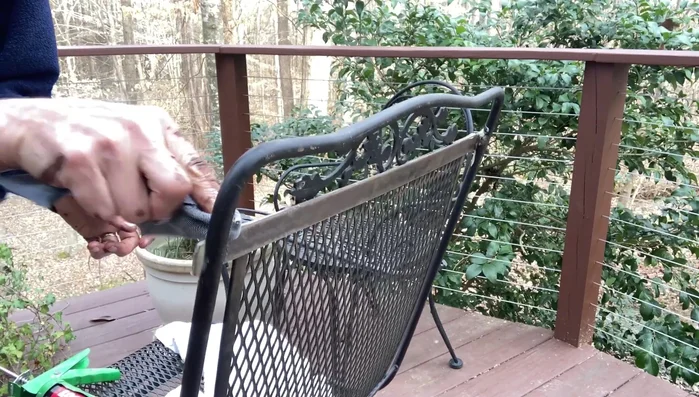
Prepare the Steel Bar Apply Adhesive and Attach Bar
- Apply construction adhesive to the back of the chair where the steel bar will be attached, and also to both sides of the front.
- Carefully position the steel bar onto the adhesive.
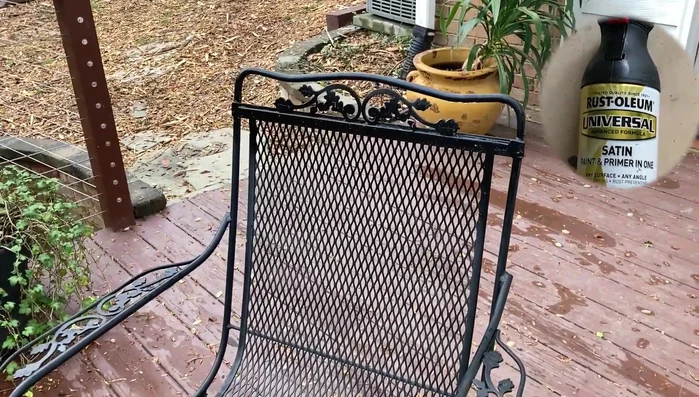
Finish and Touch Up
- Wipe off any excess adhesive for a clean finish.
- Touch up with black satin spray paint.
Finish and Touch Up
Read more: Silence that Squeaky Bed: A Complete Fix-It Guide
Tips
- You can obtain a steel flat bar at any home improvement store.